MySQL is a widely used relational database management system (RDBMS).
MySQL is free and open-source.
MySQL is ideal for both small and large applications.


https://dev.mysql.com/downloads/installer/
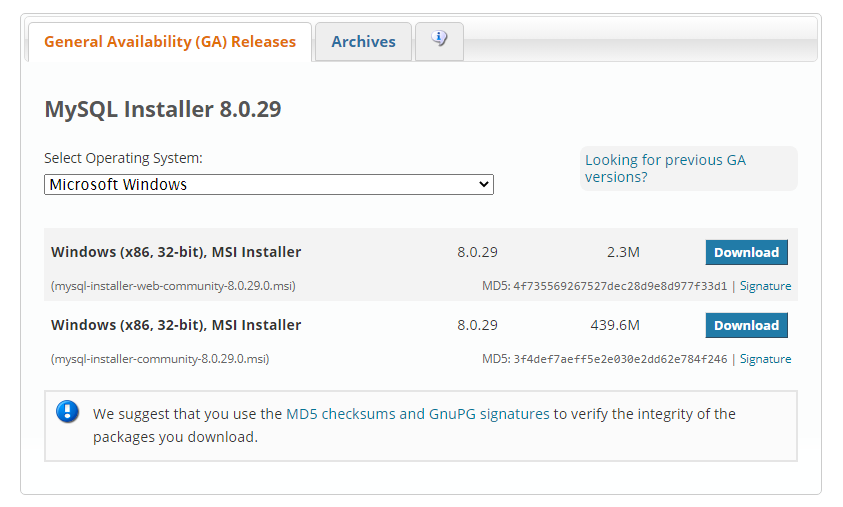
Go to the official website of MySQL and download the community server edition software. Here, you will see the option to choose the Operating System, such as Windows.
Next, there are two options available to download the setup. Choose the version number for the MySQL community server, which you want. If you have good internet connectivity, then choose the mysql-installer-web-community. Otherwise, choose the other one.

After downloading the setup, unzip it anywhere and double click the MSI installer .exe file. It will give the following screen:
In the next wizard, choose the Setup Type. There are several types available, and you need to choose the appropriate option to install MySQL product and features. Here, we are going to select the Full option and click on the Next button.
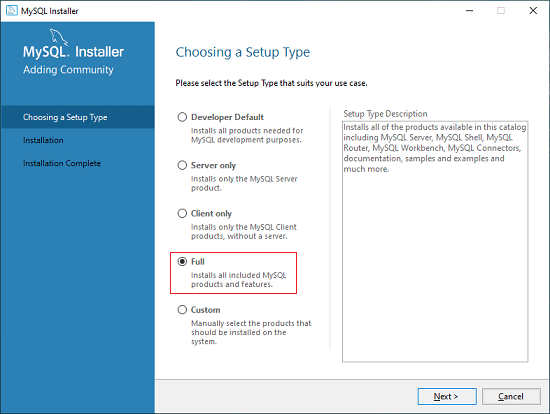 This option will install the following things: MySQL Server, MySQL Shell, MySQL Router, MySQL Workbench, MySQL Connectors, documentation, samples and examples, and many more.
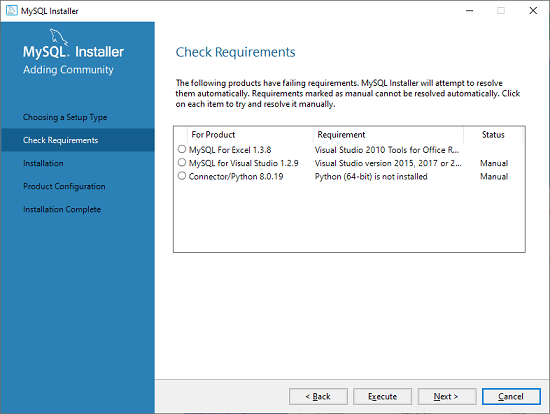
Once we click on the Next button, it may give information about some features that may fail to install on your system due to a lack of requirements. We can resolve them by clicking on the Execute button that will install all requirements automatically or can skip them. Now, click on the Next button.
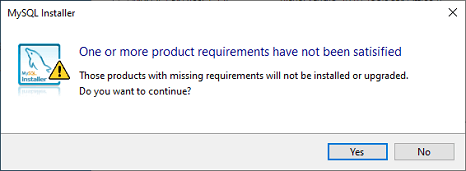
In the next wizard, we will see a dialog box that asks for our confirmation of a few products not getting installed. Here, we have to click on the Yes button.
 After clicking on the Yes button, we will see the list of the products which are going to be installed. So, if we need all products, click on the Execute button.

Once we click on the Execute button, it will download and install all the products. After completing the installation, click on the Next button.

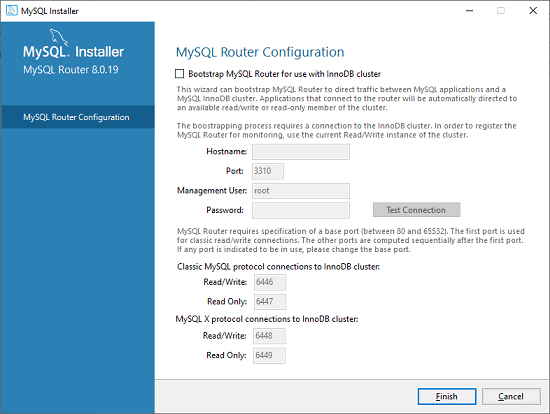
In the next wizard, we need to configure the MySQL Server and Router. Here, I am not going to configure the Router because there is no need to use it with MySQL. We are going to show you how to configure the server only. Now, click on the Next button.

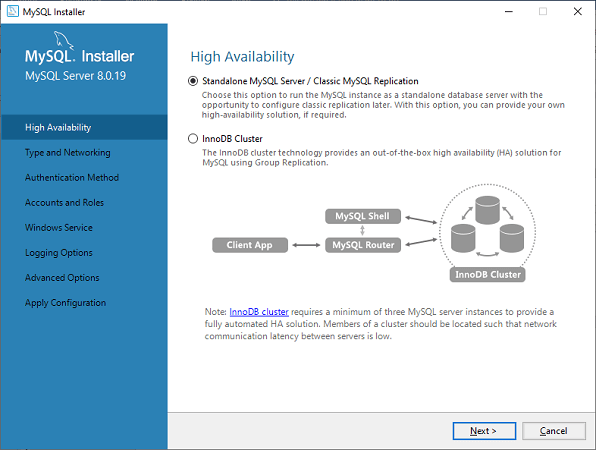
As soon as you will click on the Next button, you can see the screen below. Here, we have to configure the MySQL Server. Now, choose the Standalone MySQL Server/Classic MySQL Replication option and click on Next. Here, you can also choose the InnoDB Cluster based on your needs.
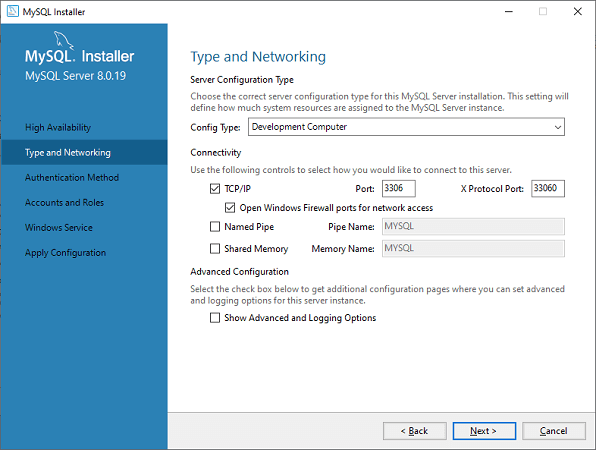
In the next screen, the system will ask you to choose the Config Type and other connectivity options. Here, we are going to select the Config Type as 'Development Machine' and Connectivity as TCP/IP, and Port Number is 3306, then click on Next.
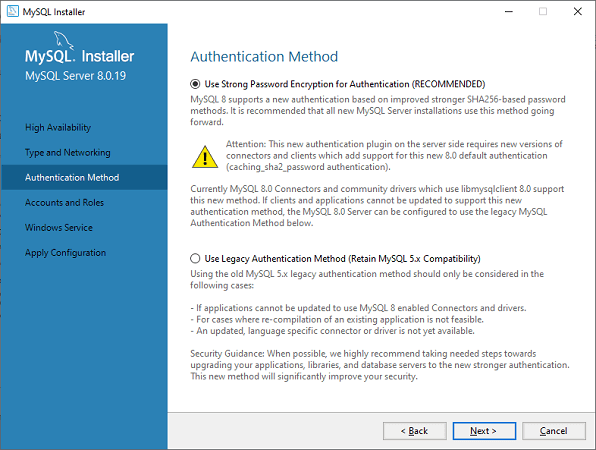
Now, select the Authentication Method and click on Next. Here, I am going to select the first option.
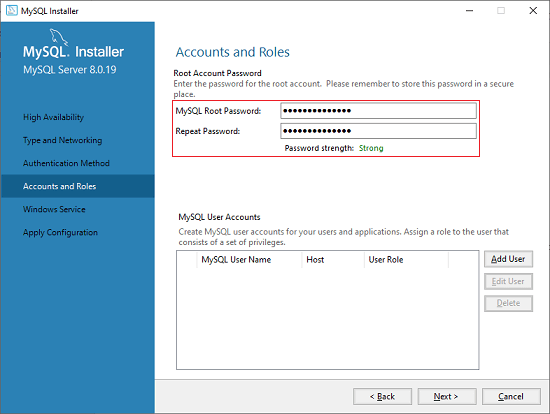
The next screen will ask you to mention the MySQL Root Password. After filling the password details, click on the Next button.
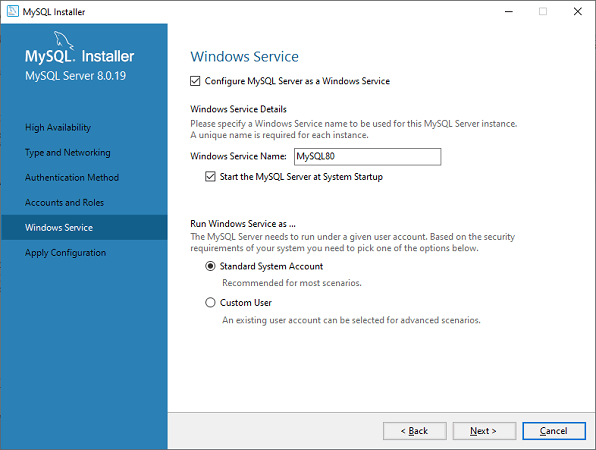
The next screen will ask you to configure the Windows Service to start the server. Keep the default setup and click on the Next button.
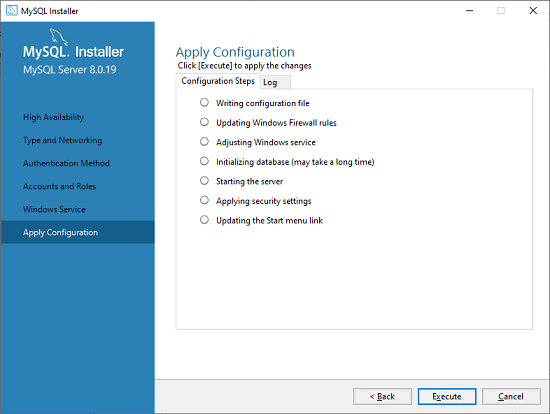
In the next wizard, the system will ask you to apply the Server Configuration. If you agree with this configuration, click on the Execute button.
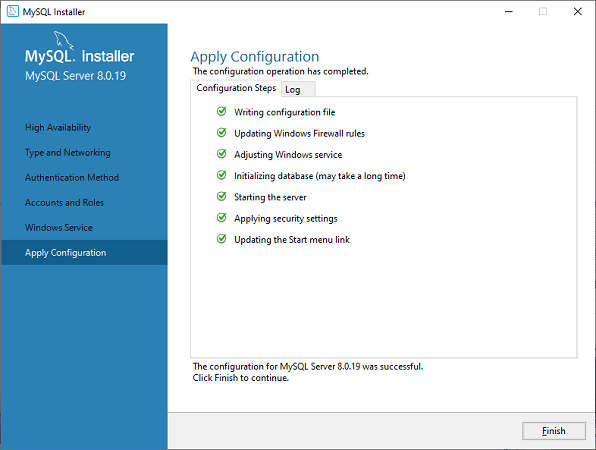
Once the configuration has completed, you will get the screen below. Now, click on the Finish button to continue.
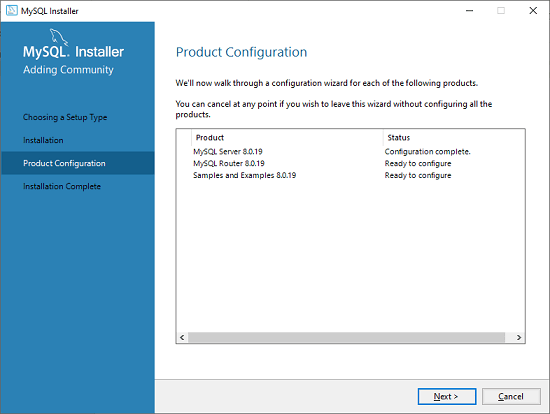
In the next screen, you can see that the Product Configuration is completed. Keep the default setting and click on the Next-> Finish button to complete the MySQL package installation.
In the next wizard, we can choose to configure the Router. So click on Next->Finish and then click the Next button.
In the next wizard, we will see the Connect to Server option. Here, we have to mention the root password, which we had set in the previous steps.
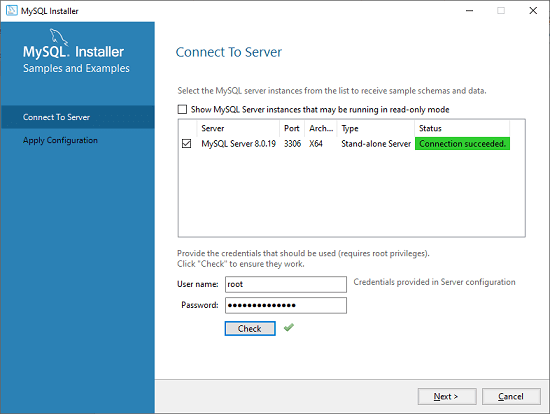 In this screen, it is also required to check about the connection is successful or not by clicking on the Check button. If the connection is successful, click on the Execute button. Now, the configuration is complete, click on Next.
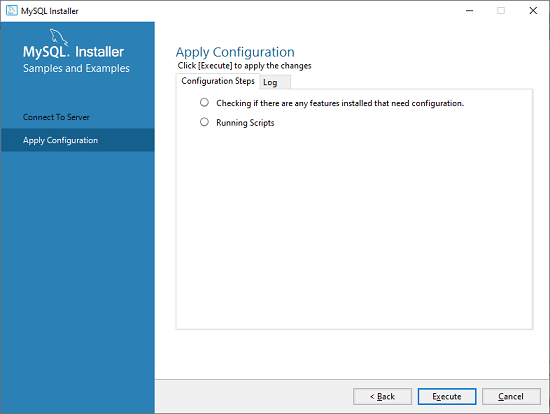
In the next wizard, select the applied configurations and click on the Execute button.
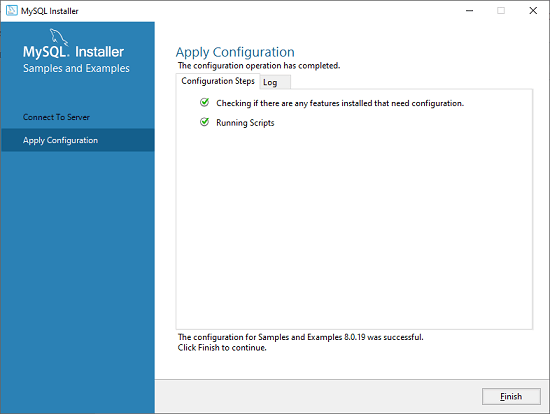
After completing the above step, we will get the following screen. Here, click on the Finish button.
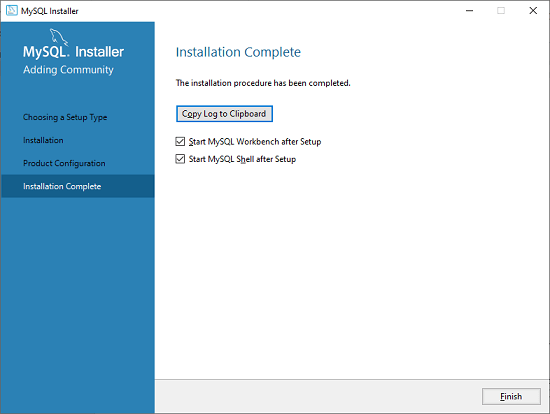
Now, the MySQL installation is complete. Click on the Finish button.
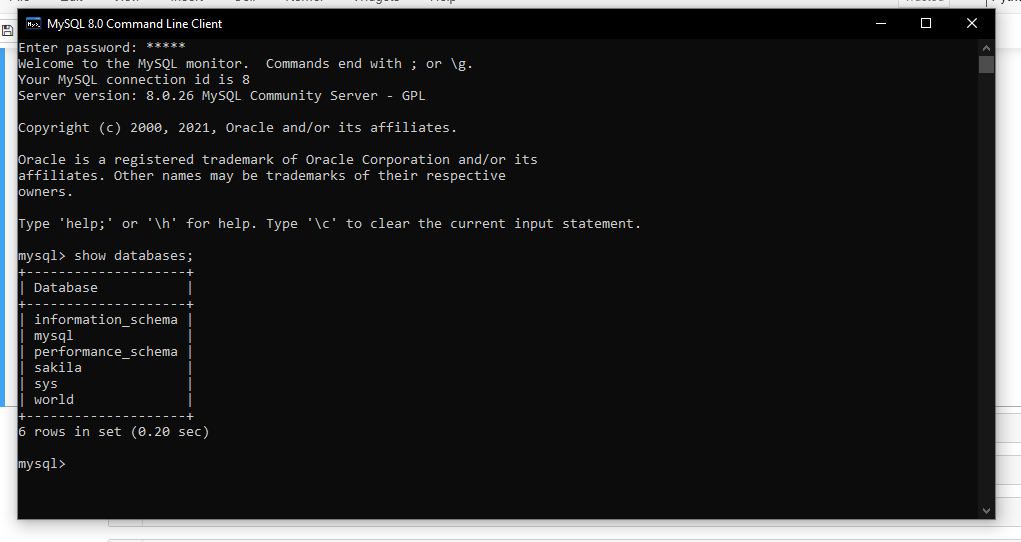
Once MySQL has been successfully installed, the base tables have been initialized, and the server has been started, you can verify its working via some simple tests.
Open your MySQL Command Line Client; it should have appeared with a mysql> prompt. If you have set any password, write your password here. Now, you are connected to the MySQL server, and you can execute all the SQL command at mysql> prompt as follows:
Check the already created databases with show databases command:
A primary key is a single field or combination of fields that contain a unique record. It must be filled. None of the fields of the primary key can contain a null value. A table can have only one primary key.