CubeSatSim Loaner User Guide
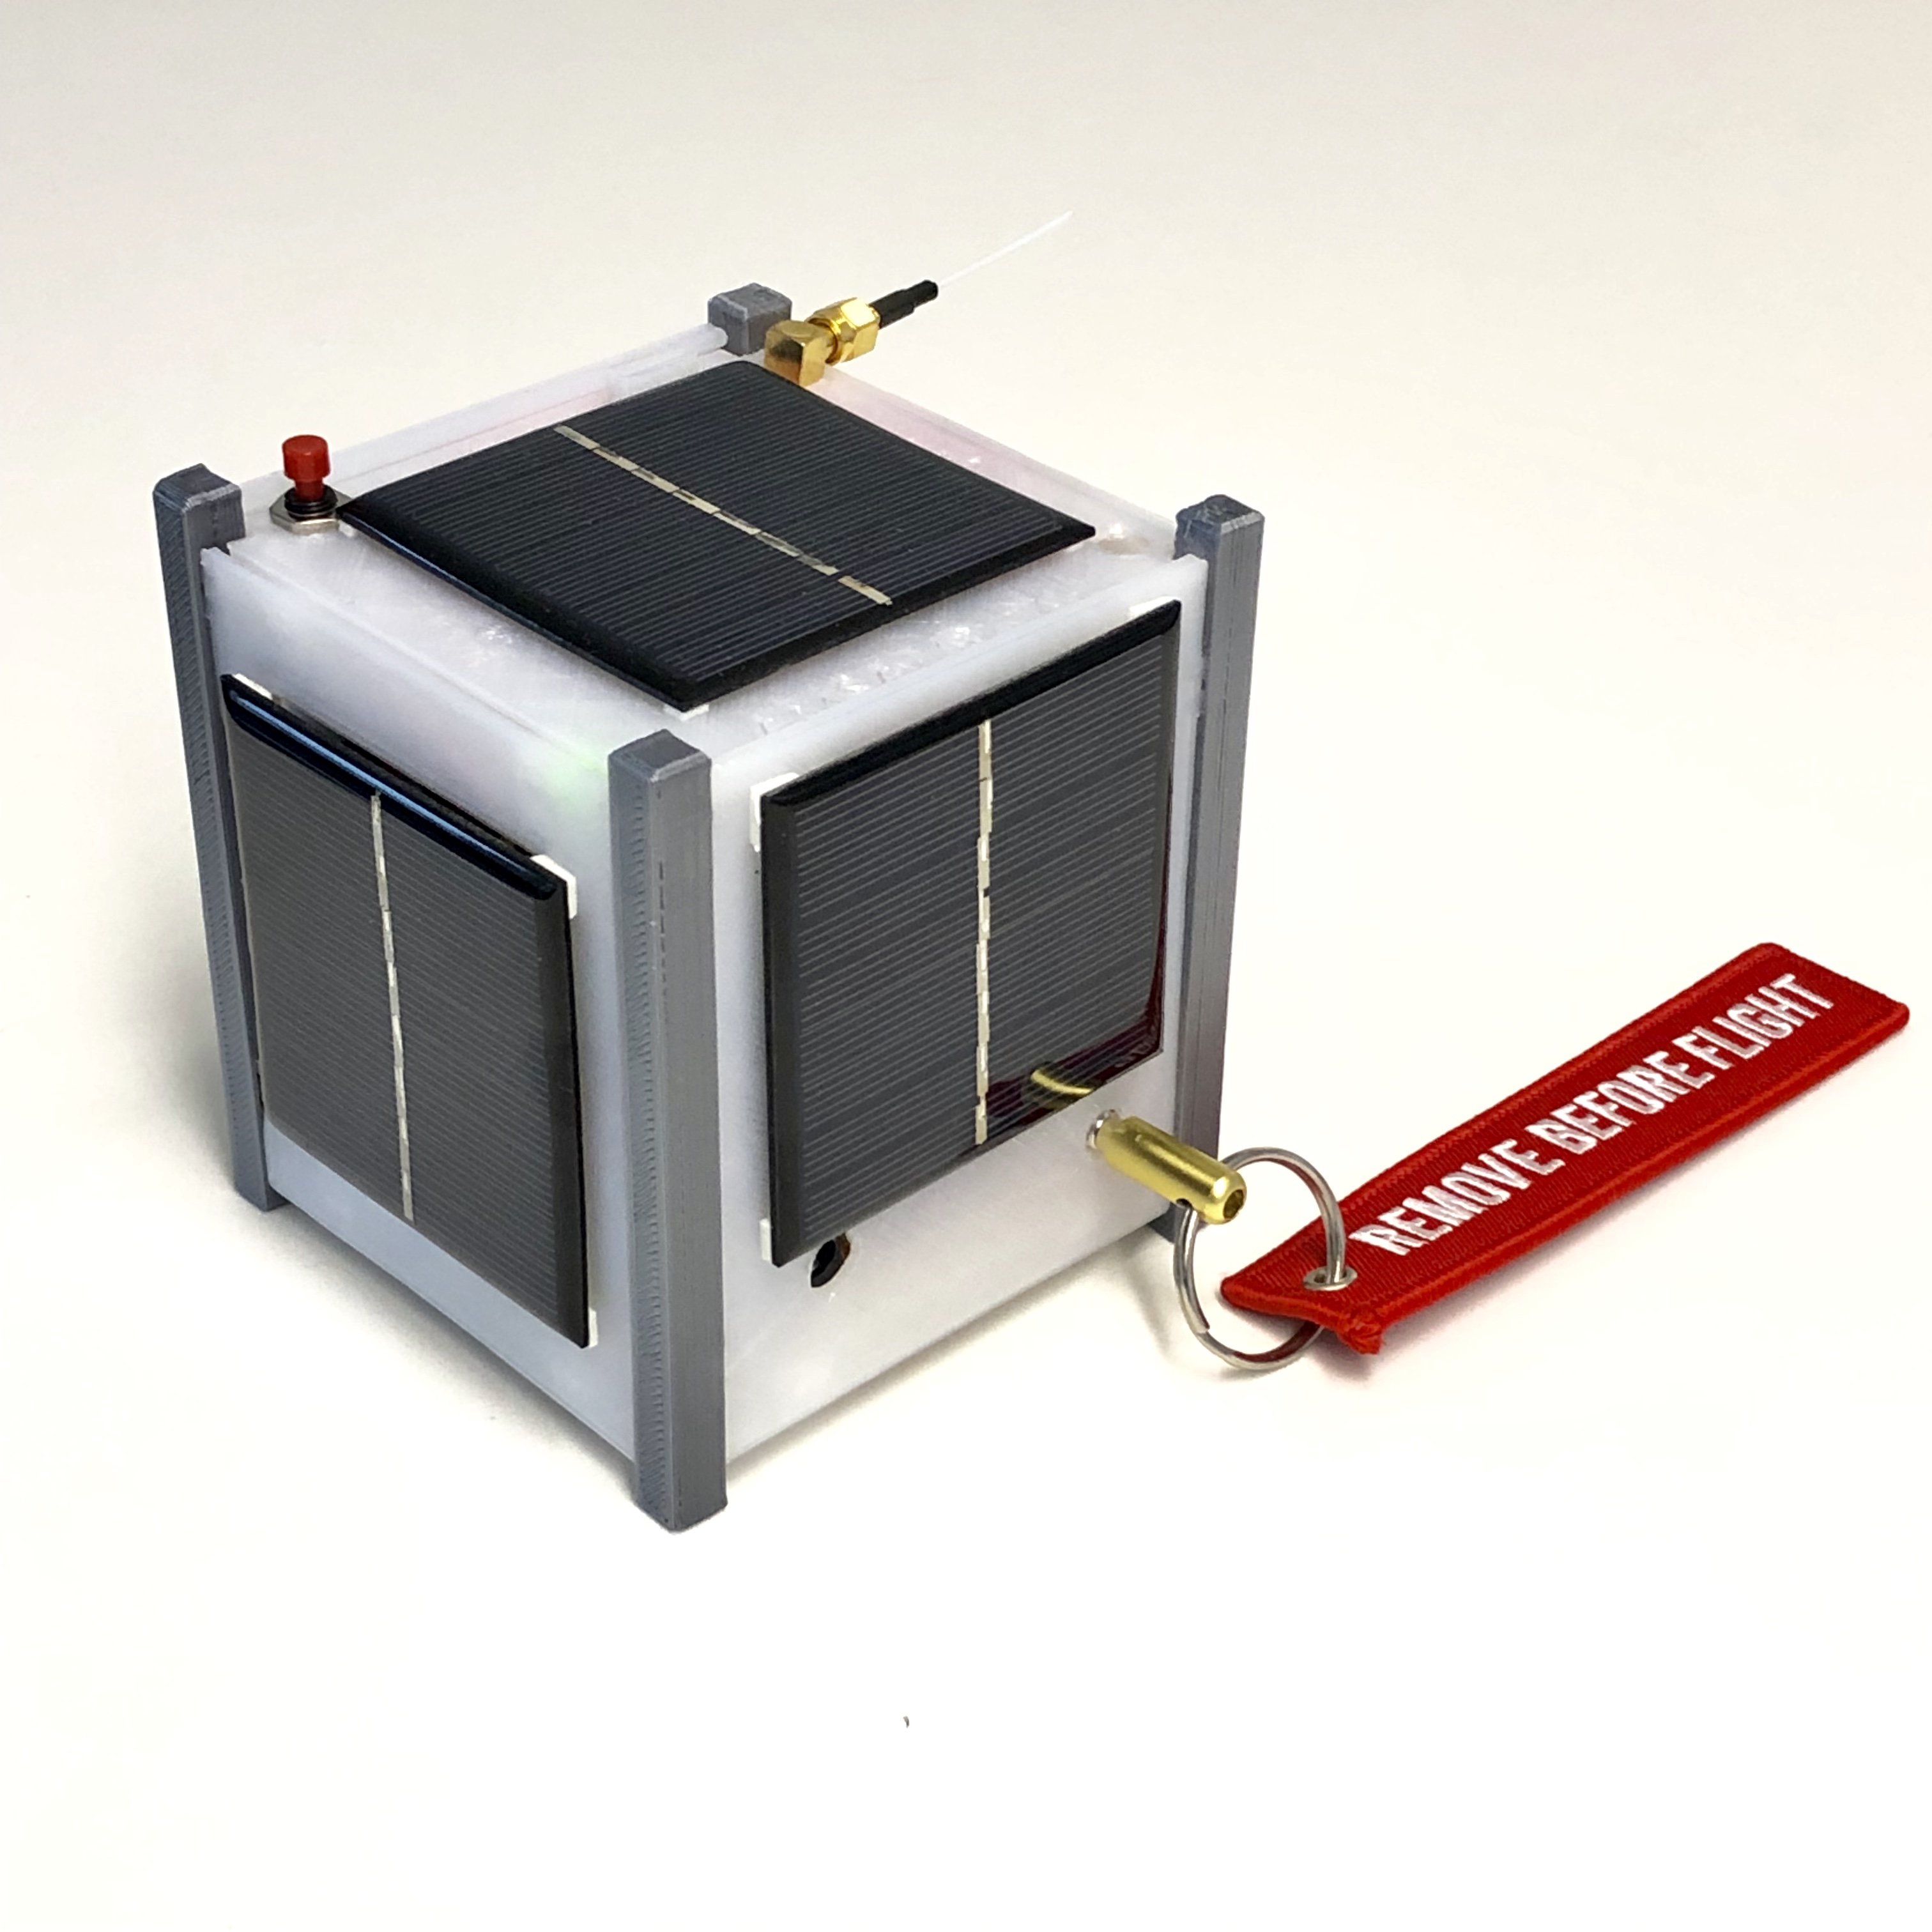
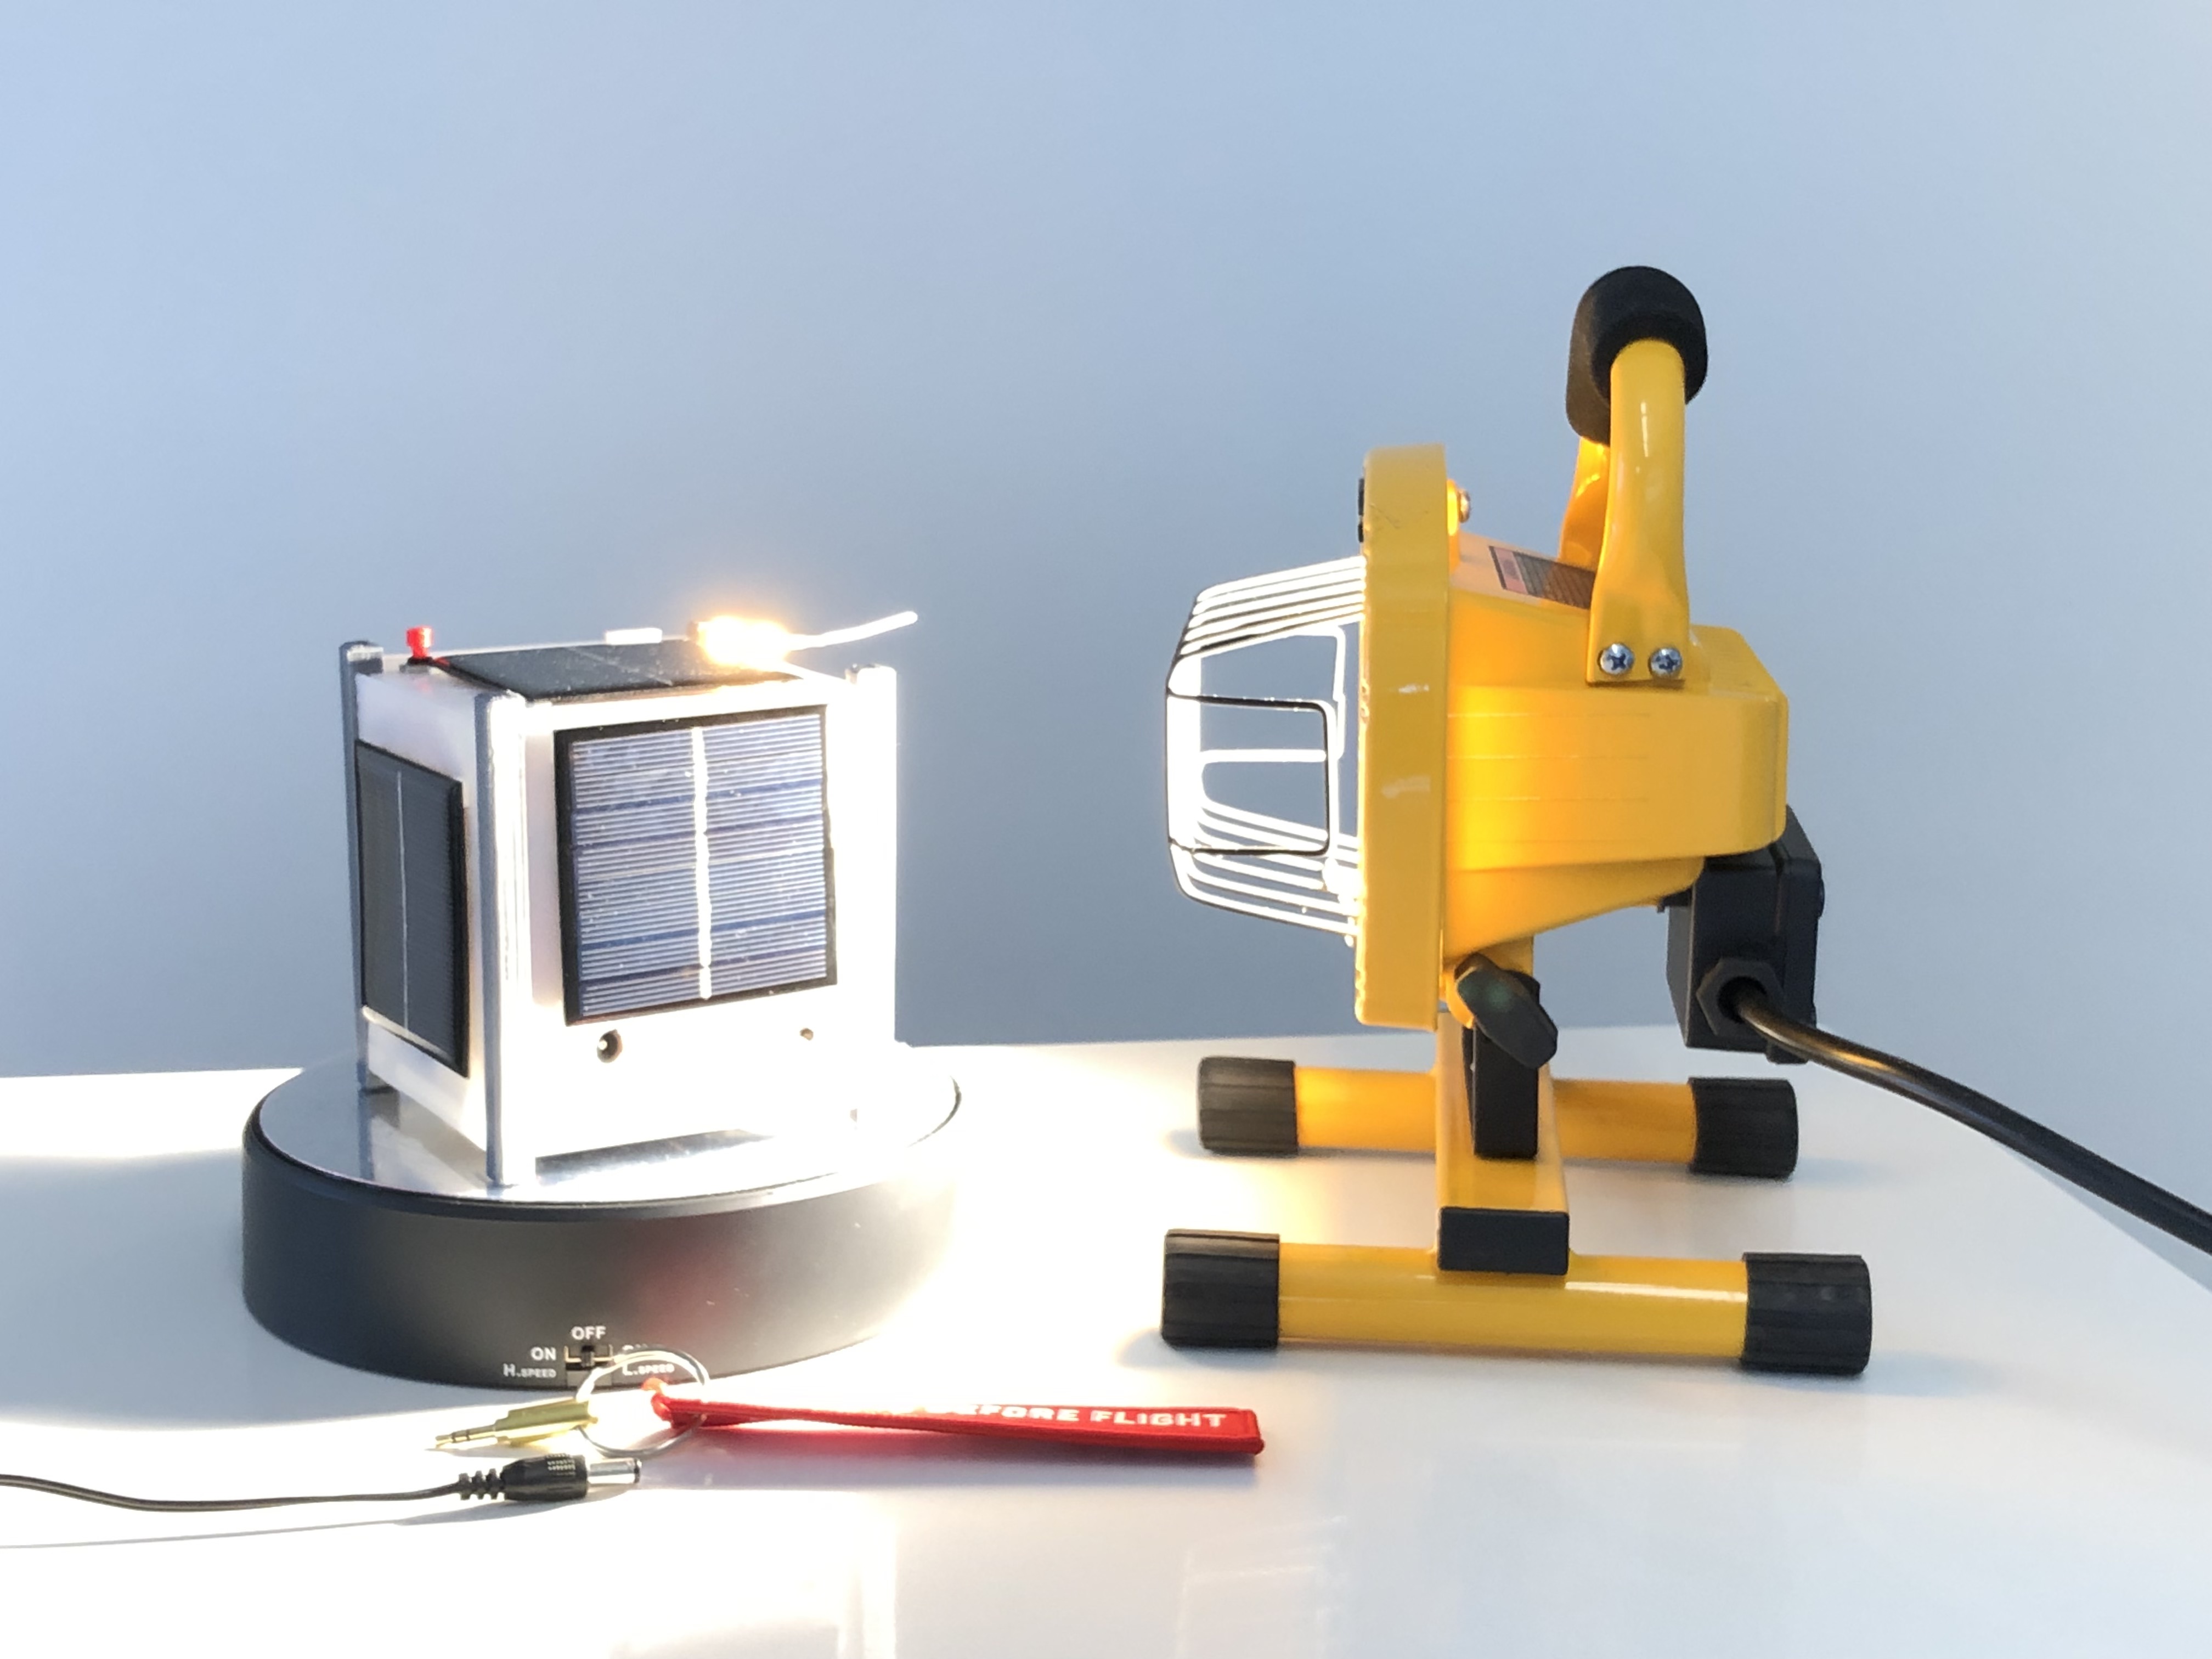
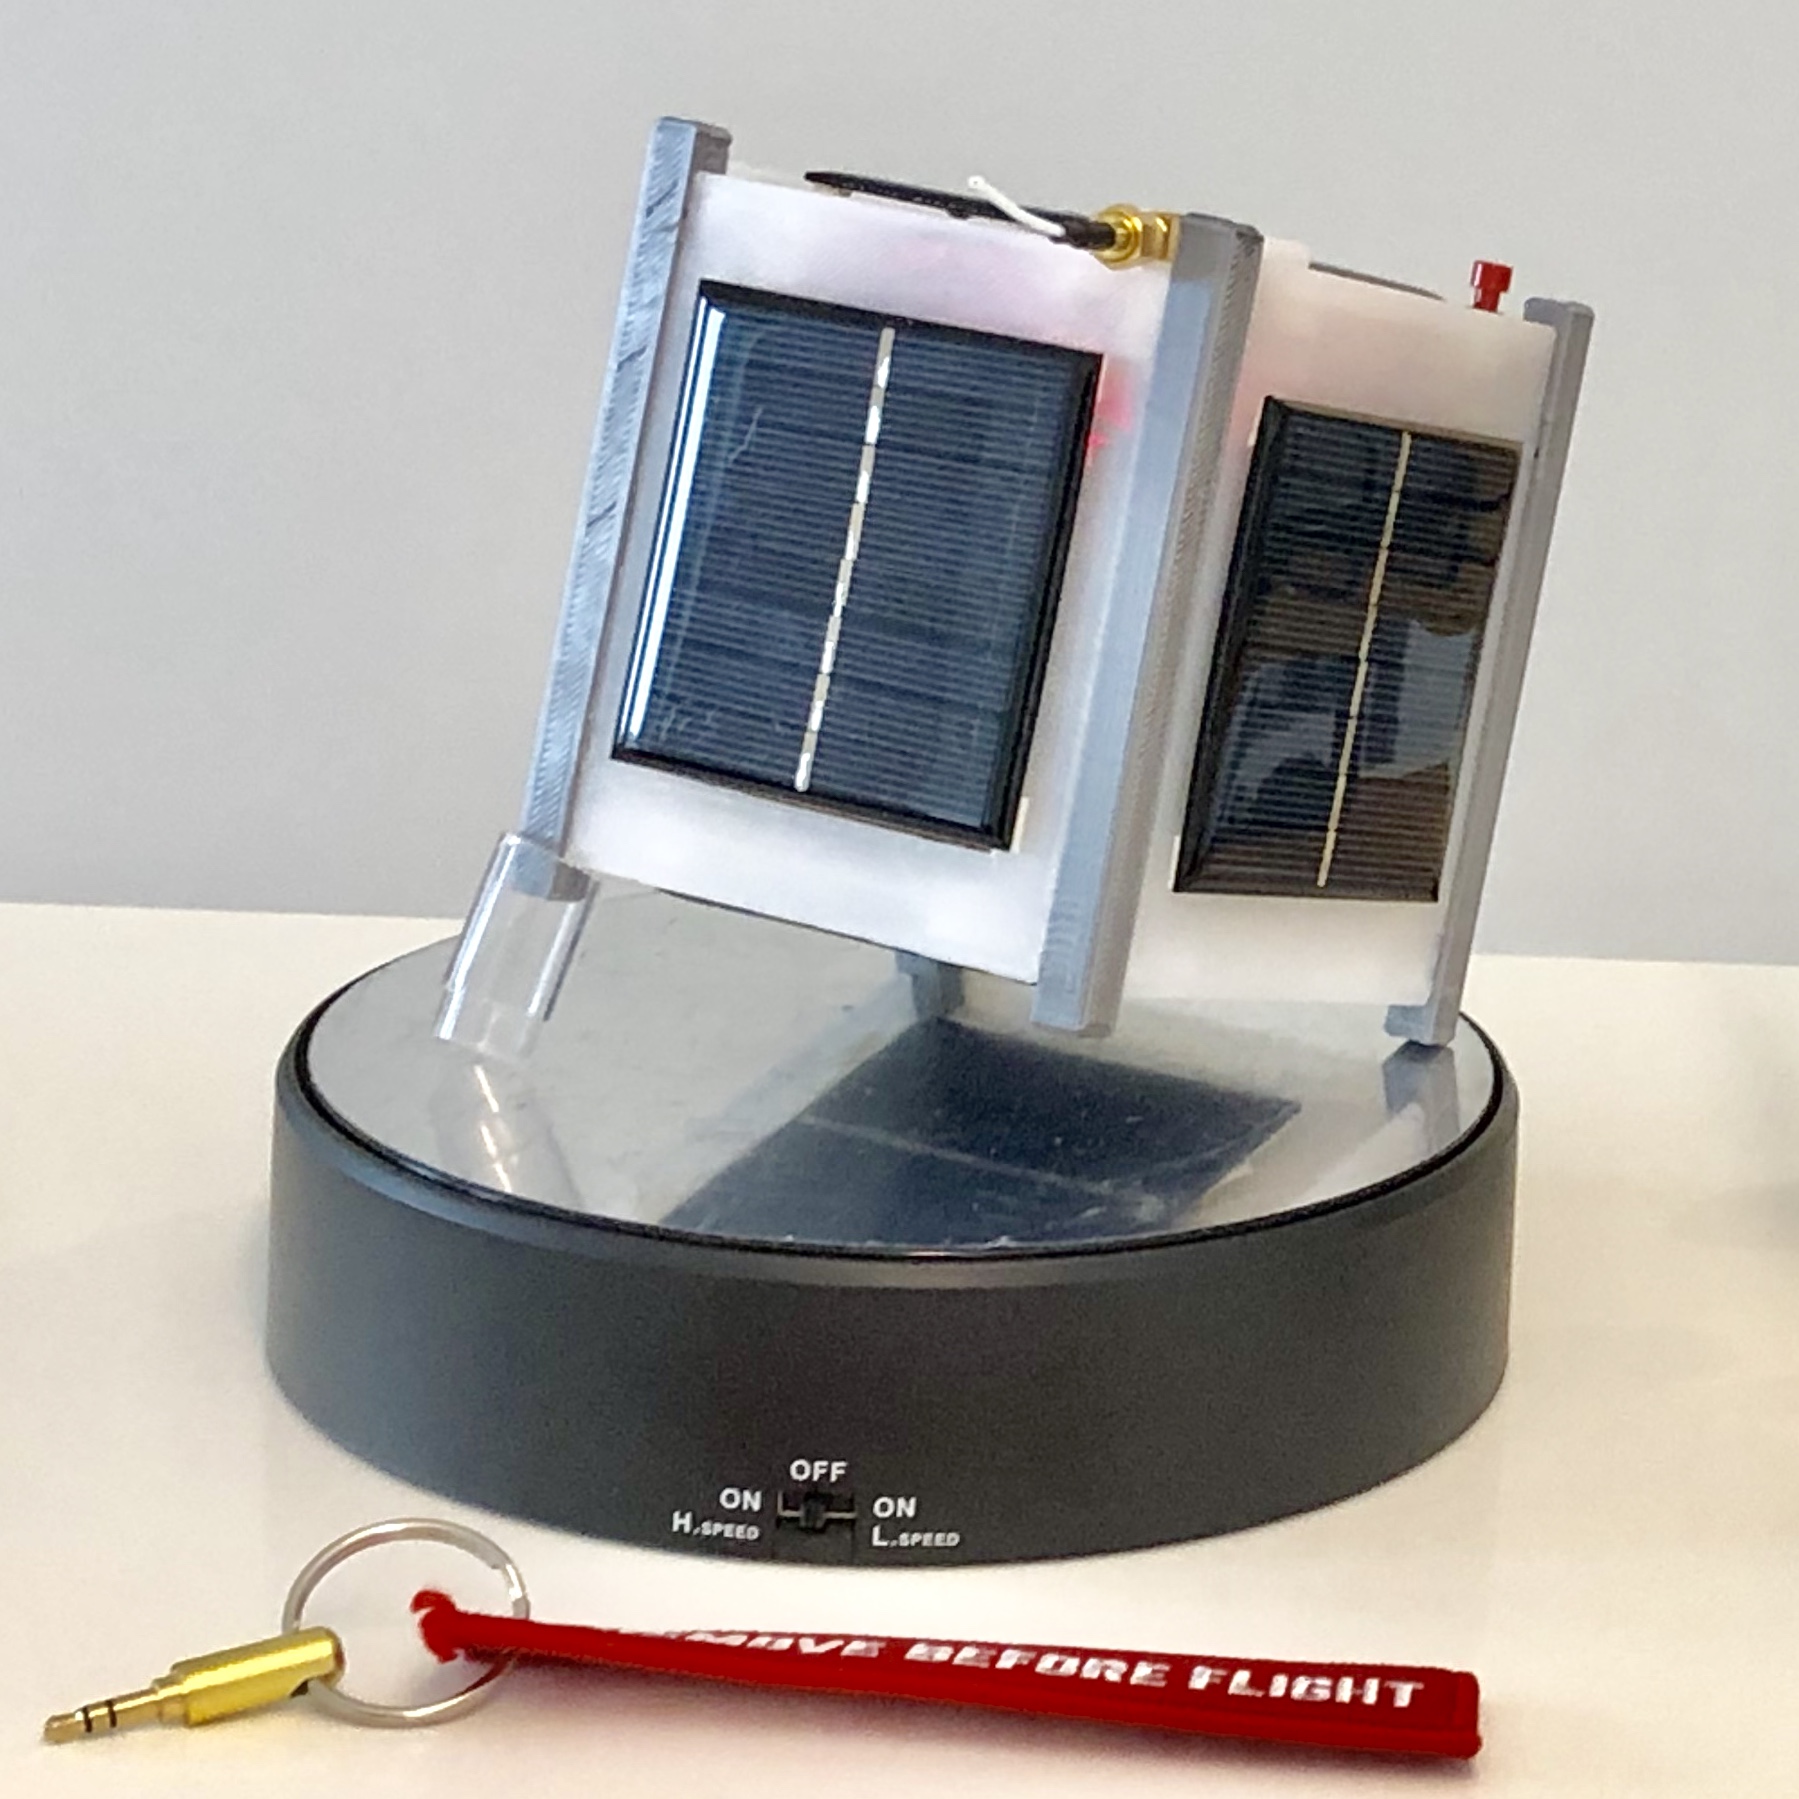
This User Guide describes how to setup and use your CubeSatSim Loaner. Note that the current loaner hardware is the original CubeSatSim vB3 with the TFB running the latest software. This looks like this:
Here is a video showing how to unpack and set it up:
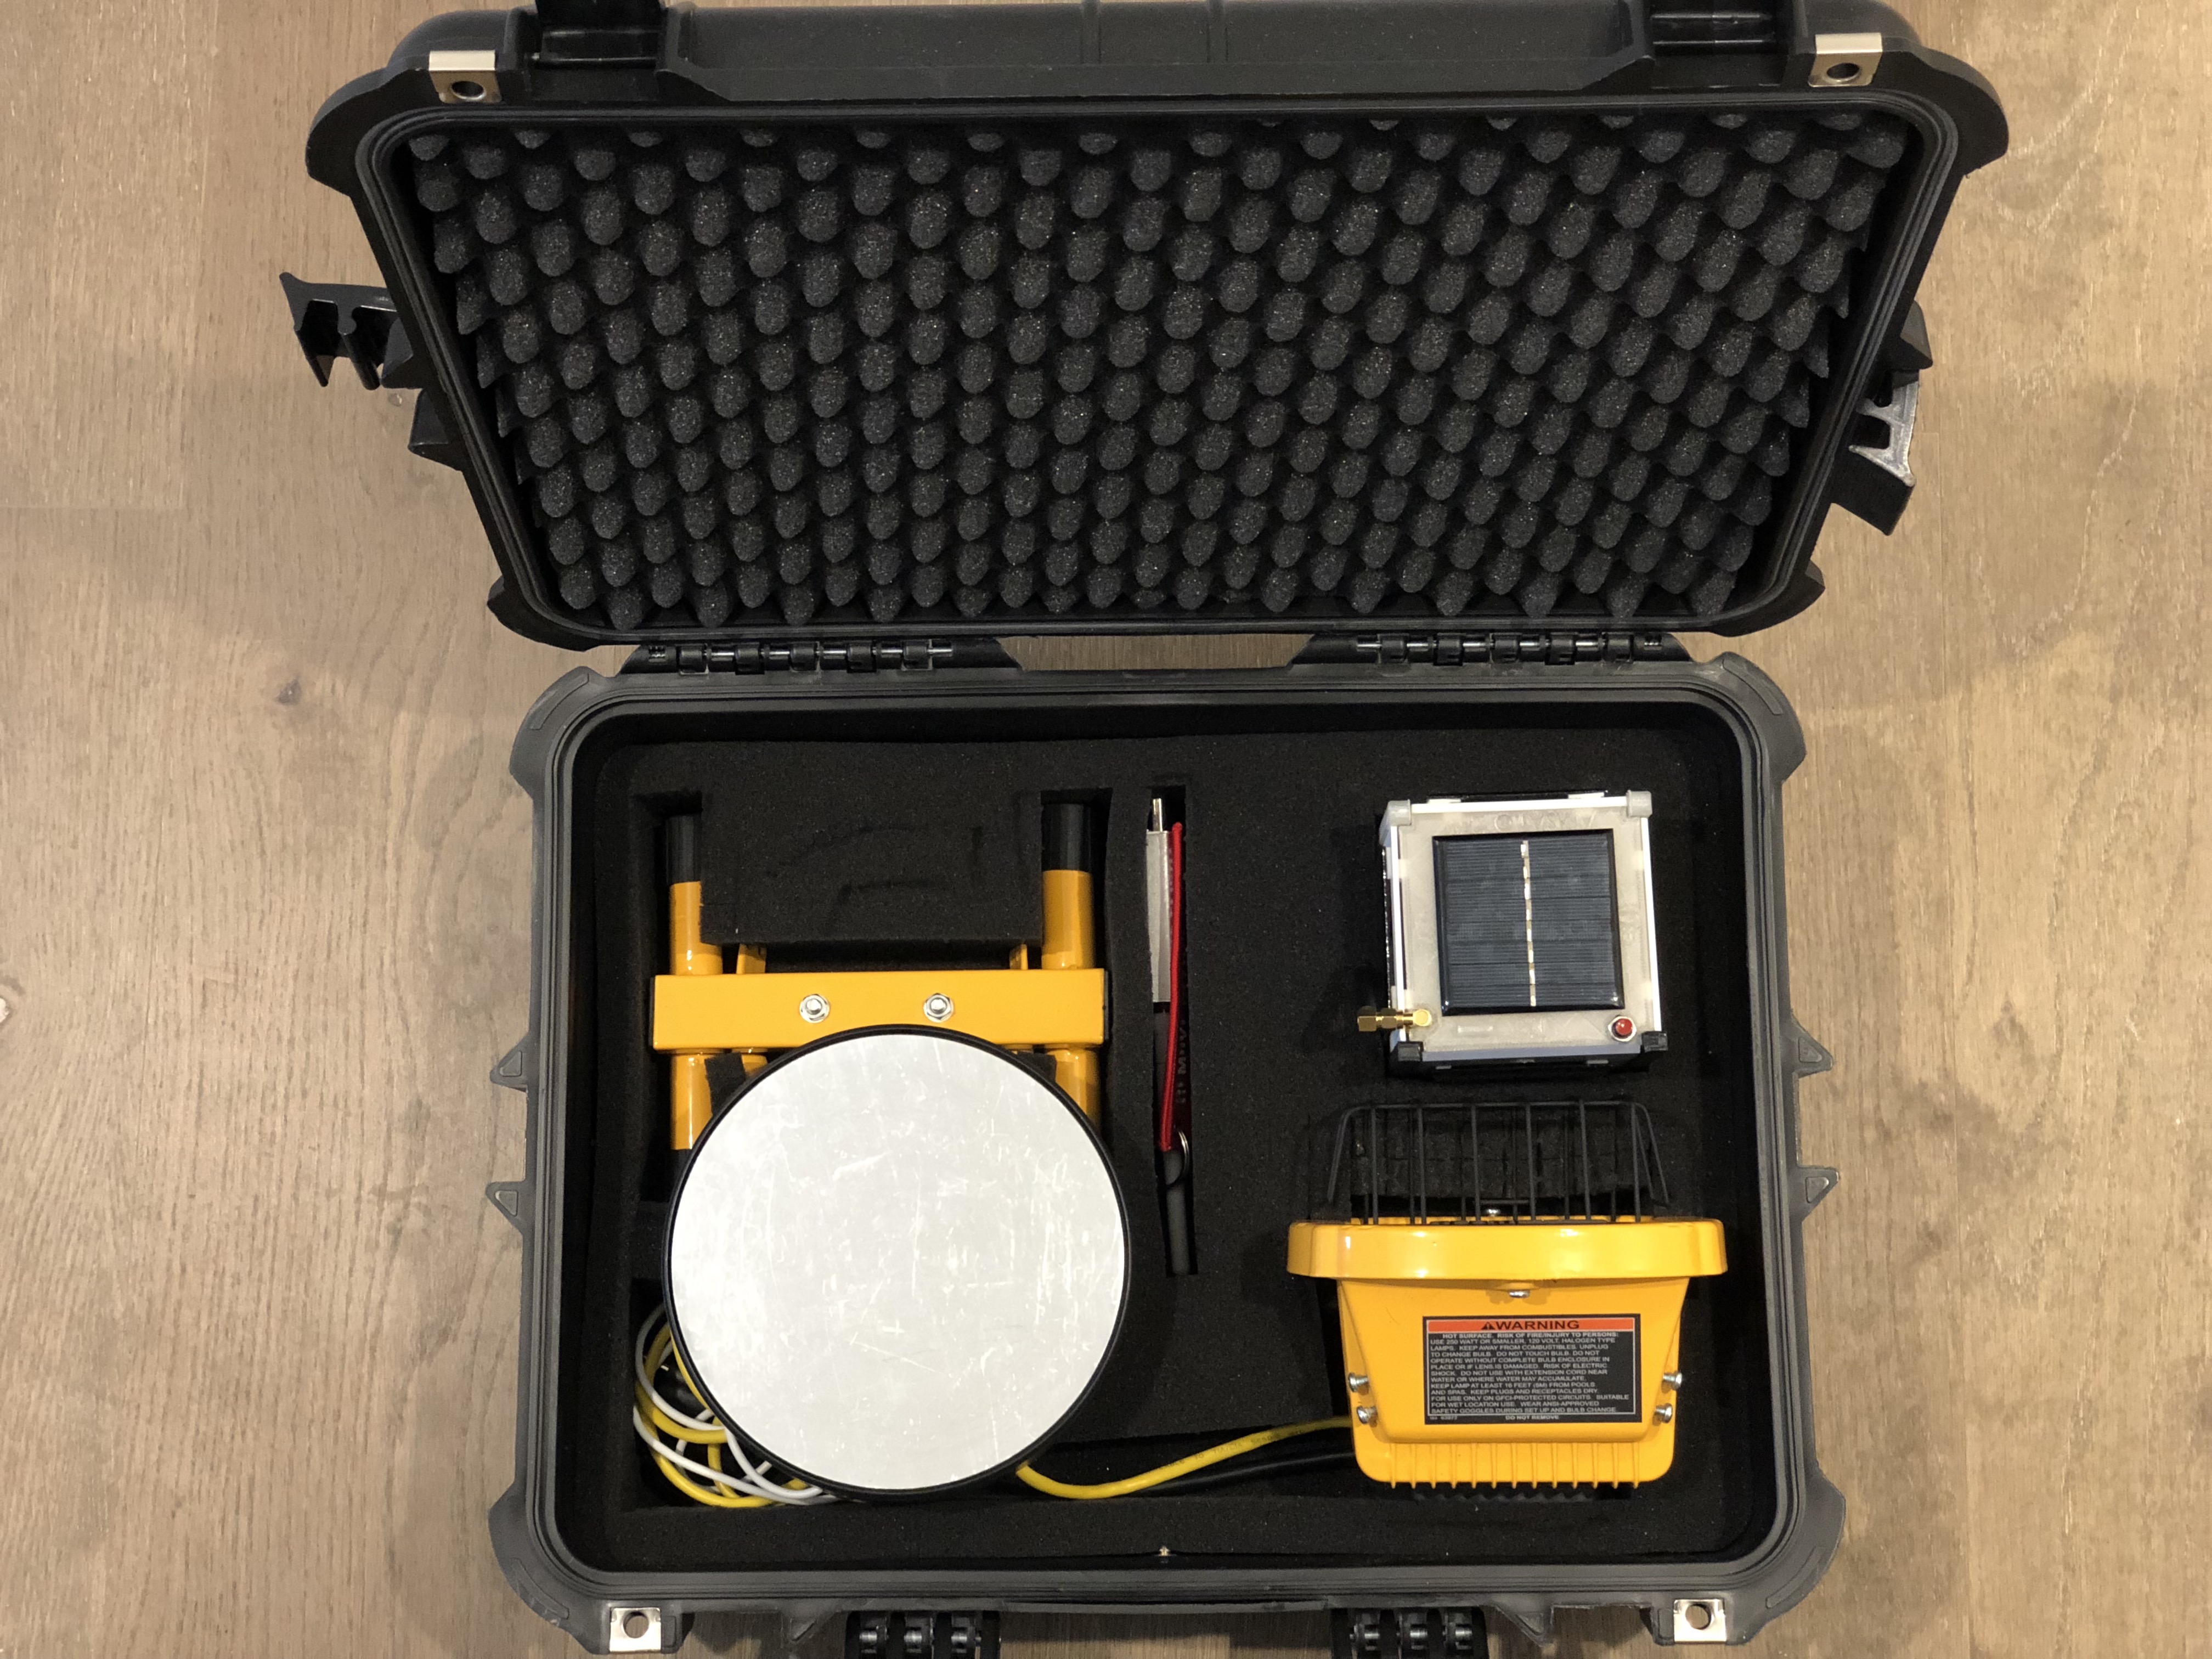
If you received an AMSAT CubeSat Simulator kit, this section describes how to unpack it. Kit contents (your kit may vary slightly, check enclosed packing list):
- CubeSatSim
- Remove Before Flight pin
- DC charging cable
- 9V NiMH battery and spare battery
- Turntable (with 2x C alkaline batteries inside)
- LED lamp
- RTL-SDR Dongle with Antenna for PC Ground Station
- Packing list and return shipping instructions
-
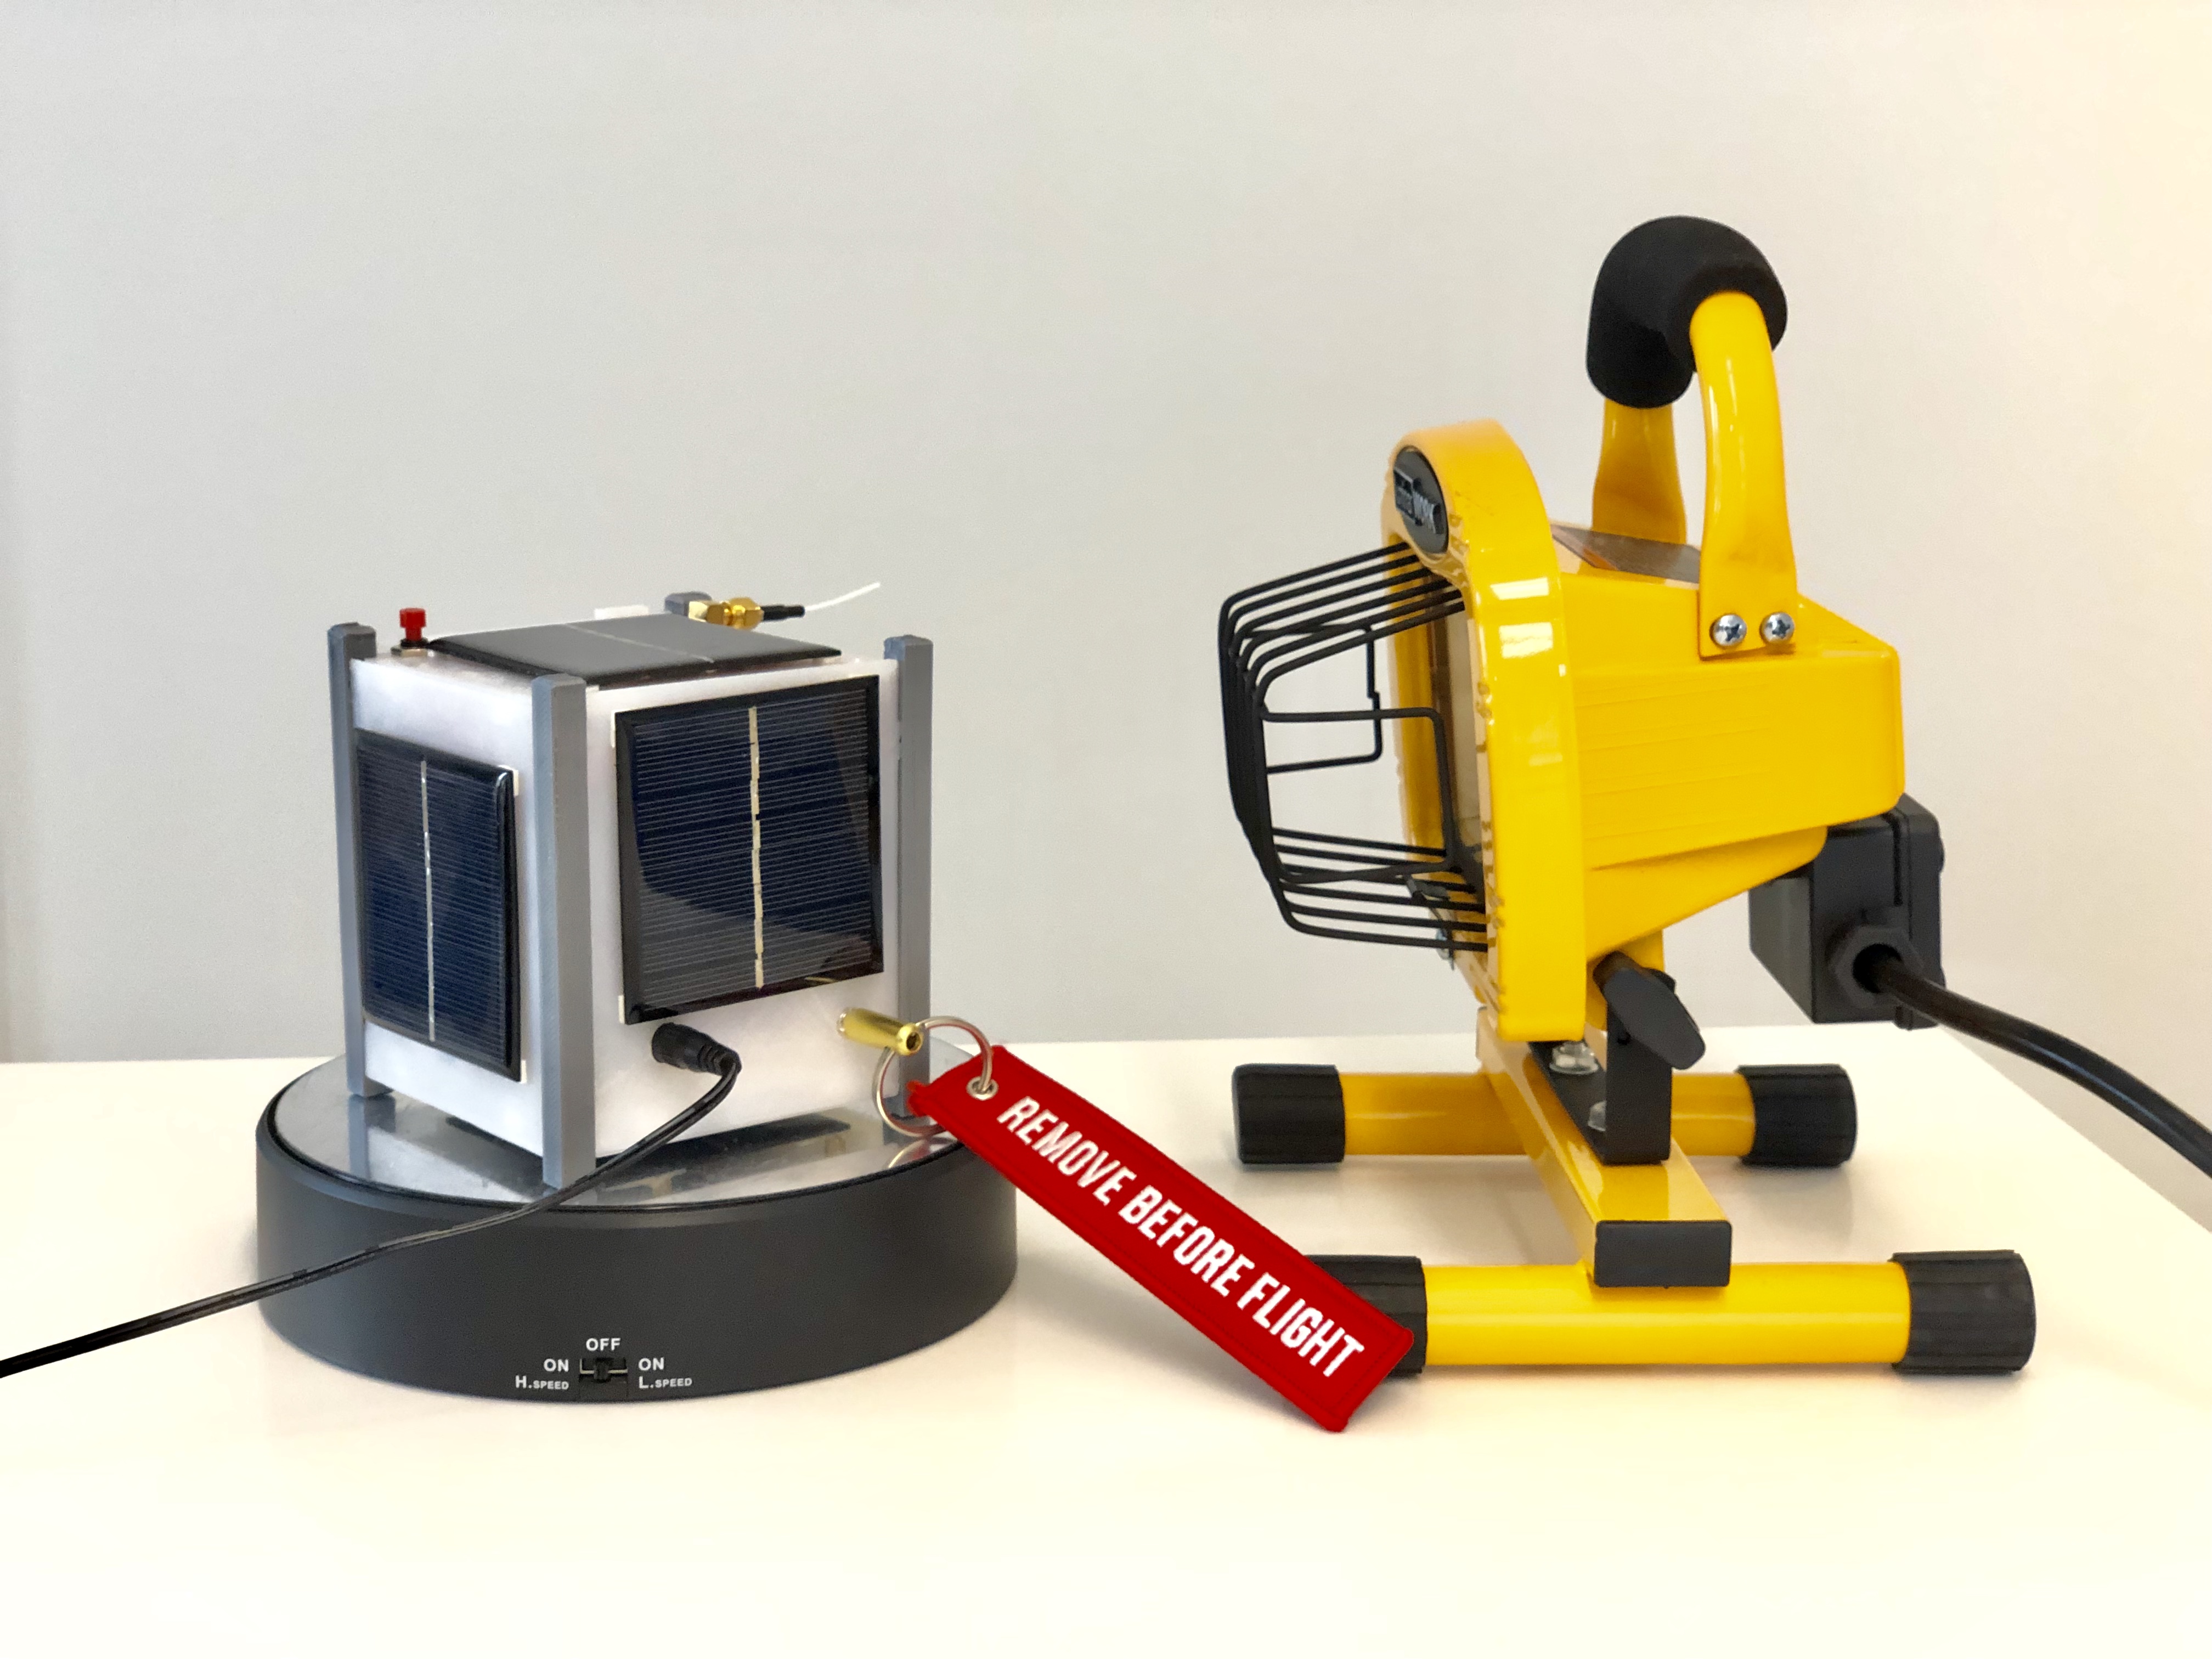
Place CubeSat Simulator on the Turntable.
-
Insert the Remove Before Flight (RBF) switch.
-
Open the top of CubeSat Simulator using a small handle tab on one side. The top has wires attached, so tilt it to one side so you can see inside. Find the 9 V battery connector inside and connect the 9 V battery. The Simulator will start to turn on and you will see some LEDs inside the case flashing.
-
Plug in the DC charging cable to the CubeSat Simulator and plug into one outlet.
-
If after 45 seconds you don't see any LED lights on the CubeSatSim, double check battery and RBF pin insertion and press the button on the top of the CubeSat Simulator for 1 second then release. The Simulator will automatically start transmitting telemetry in about 45 seconds. You can check this using a radio or a PC running SDR software and dongle, such as a Windows PC running SDR# with an RTL-SDR dongle and an antenna. Tune to 434.9 MHz for the FM signal. For the detailed instructions see https://github.com/alanbjohnston/CubeSatSim/wiki/SDR-Ground-Station-Configuration
-
Each time the CubeSatSim powers up or reboots, it will change its mode of transmitting telemetry. You can tell which mode by the sound of the audio and the look of the waterfall on an SDR. Here are the four modes in the order in which they sequence:
AFSK (Audio Frequency Shift Keying) - This mode transmits a burst of 1200 bps data every 3 seconds or so that sounds like an old dial-up modem. To decode, you need an SDR and AFSK Decoder.
FSK (Frequency Shift Keying) - This mode transmits a continuous signal that makes a rumbling sound that emulates the AMSAT Fox CubeSats such as Fox-1B. You will need Fox-Telem to decode. Fox-Telem does automatic decoding and real-time graphing of telemetry values.
BPSK (Binary Phase Shift Keying) - This mode transmits a continuous signal that sounds like noise that emulates the AMSAT Fox-1E CubeSat. You will need Fox-Telem to decode. If you are using SDR#, you will need to decode using USB not NFM. Fox-Telem does decode this signal but tuning can be tricky.
SSTV (Slow Scan TeleVision) - This mode transmits a single image in PD120 format which sounds like a series of tones. You will need SSTV decoding software such as MMSSTV or QSSTV to decode.
Practice switching telemetry modes by pressing and releasing the button and identifying the mode by the sound and look of the signal. The best mode for receiving and decoding telemetry is the FSK mode, so I'd recommend leaving the CubeSatSim in that mode.
A tutorial on using FoxTelem with the CubeSatSim is in this AMSAT Journal Article: http://cubesatsim.org/content/CubeSatSimPaper6.pdf
- Place the turntable in front of the lamp. You are now ready for launch!
-
Have a PC Ground Station with the telemetry decoding software installed.
-
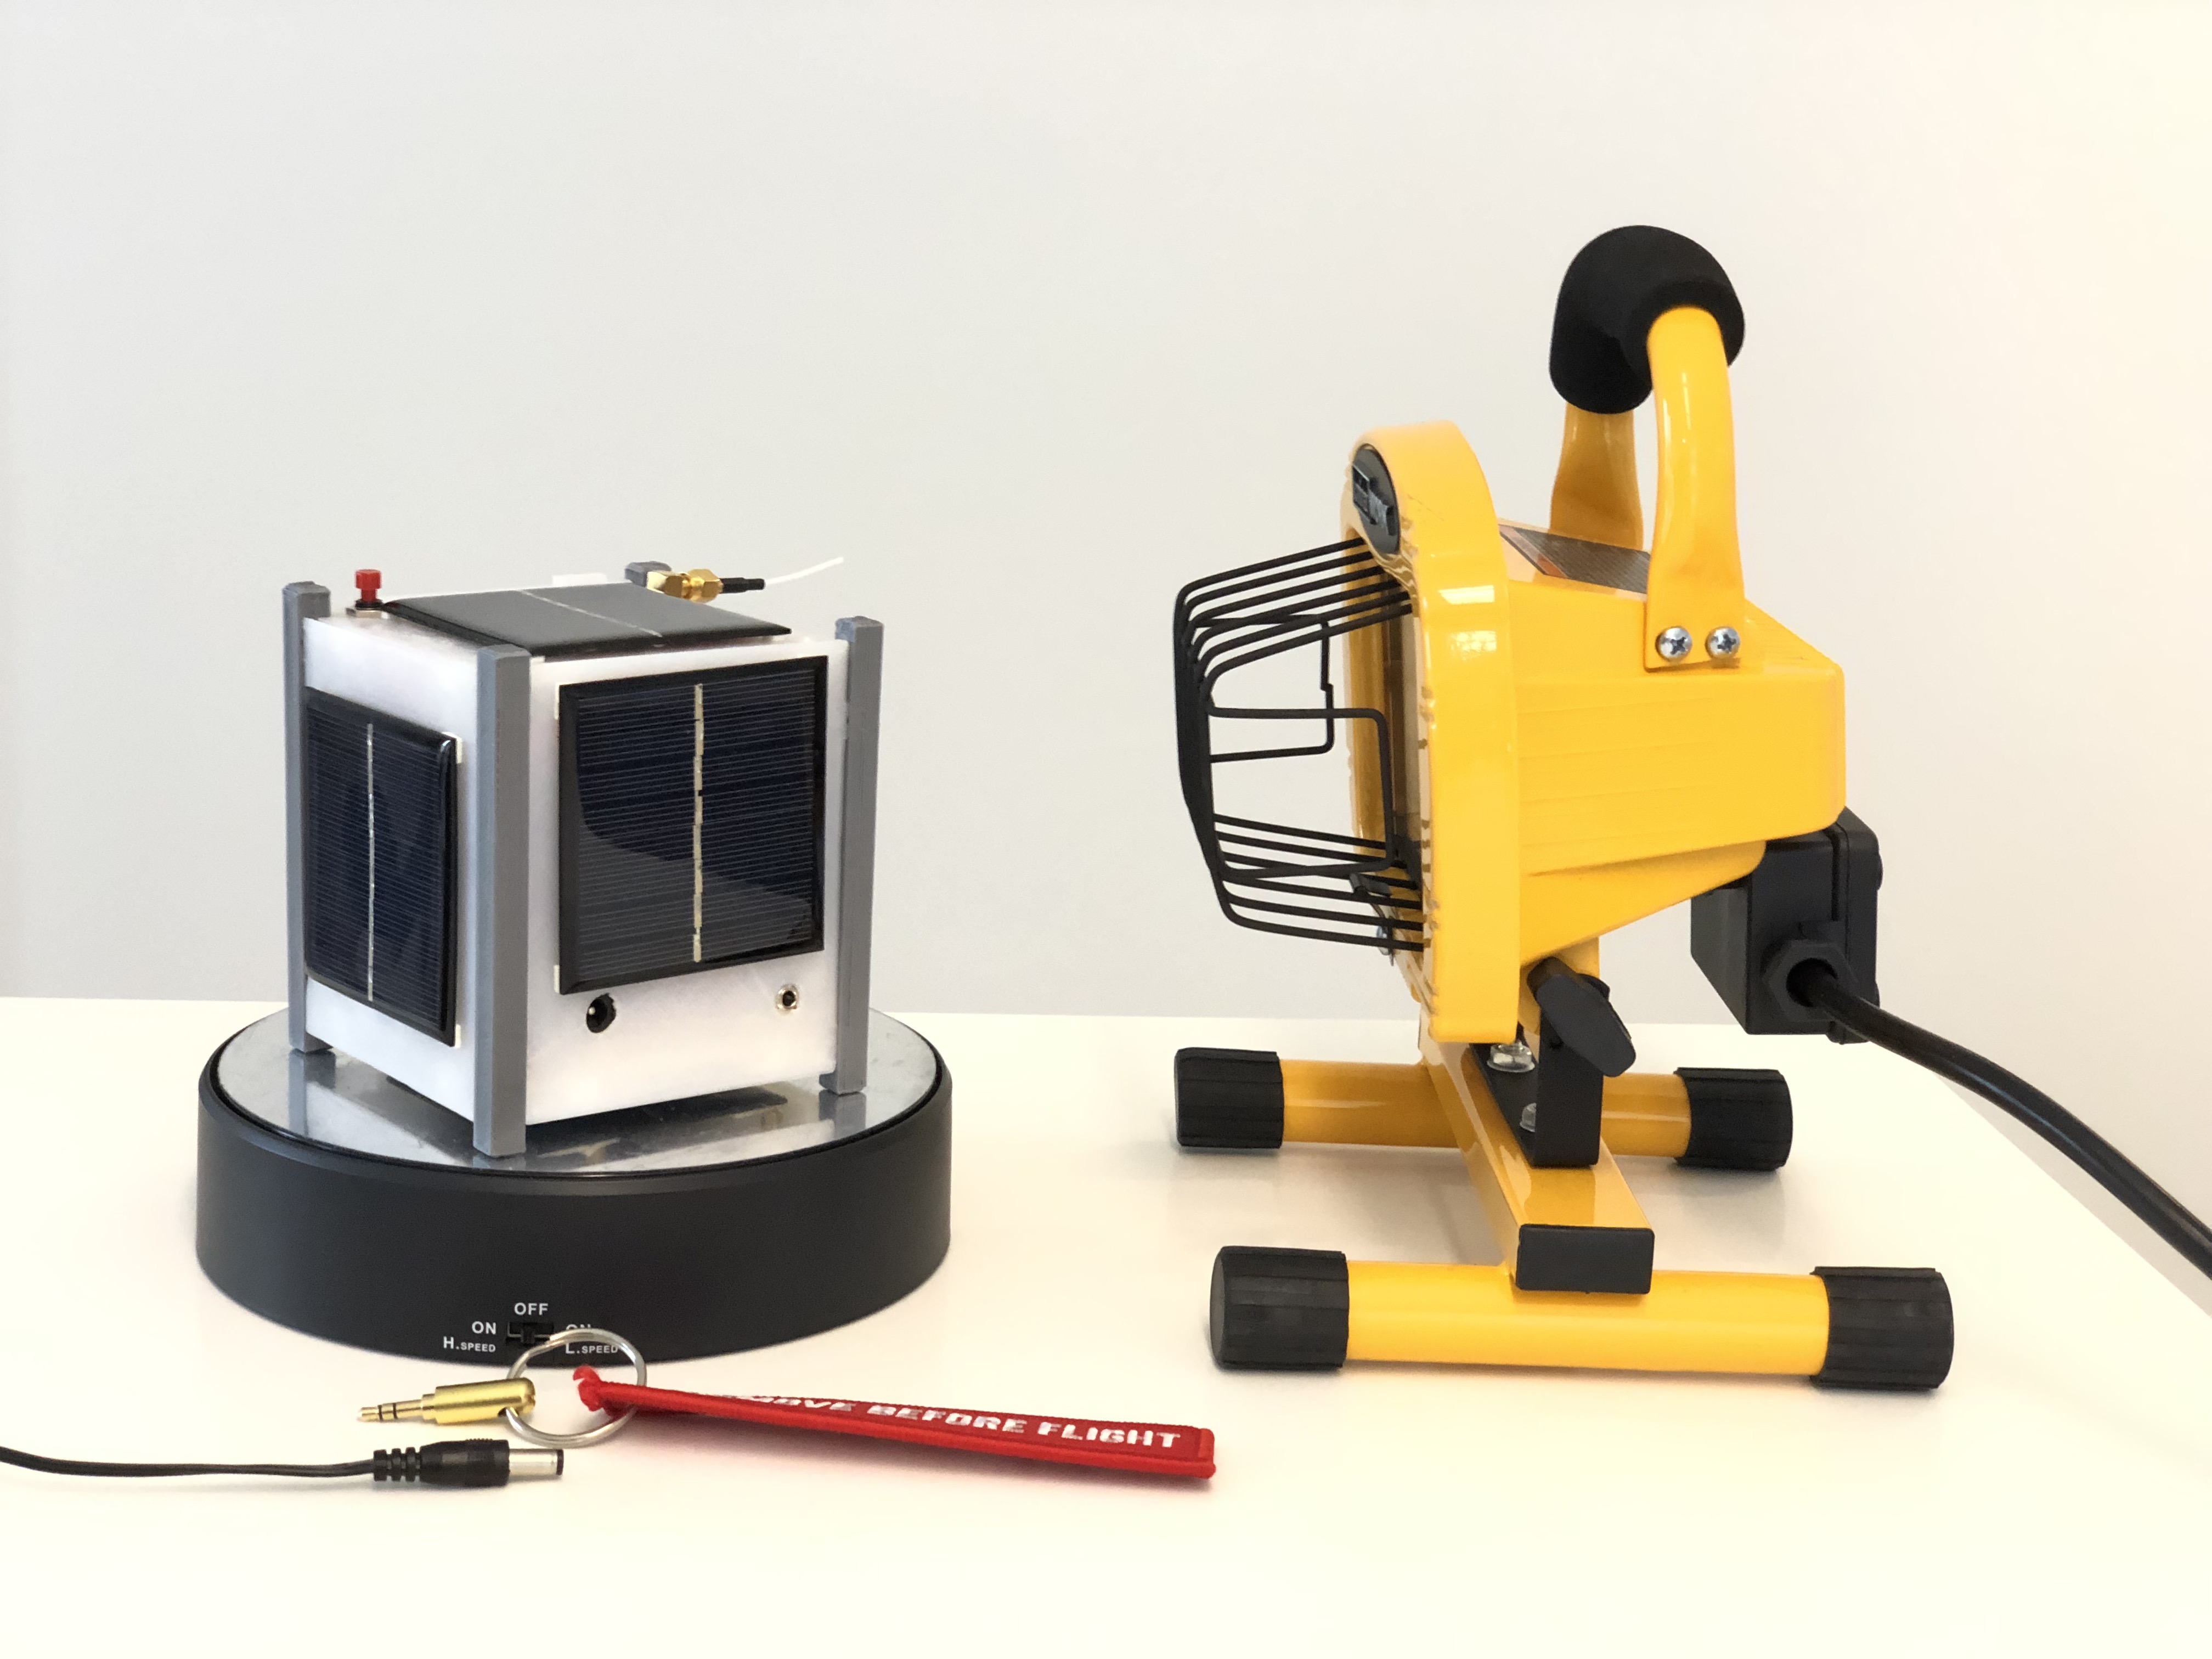
Unplug the DC power cable from Simulator.
-
Remove Remove Before Flight pin from Simulator.
-
Launch by turning on turntable to simulate spin. Start with the low speed (L).
- With the lamp off, the Simulator is in eclipse (no sunlight). To come out of eclipse, turn the lamp using the switch.
- The speed switch on the turntable can be used to change the spin rate (H or L speed). Tilting the Simulator on the turntable simulates off-axis spins.
-
Under most conditions, the Simulator battery will discharge in about 30 minutes, even with the lamps illuminated. If the battery voltage drops below 8 Volts, the Simulator will be automatically shut down. To avoid this, unplug the lamp, stop the turntable, plug in the RBF switch, and plug in the DC charging cable when you aren't gathering telemetry data to recharge the battery. The battery will take about 4 hours to recharge fully up to 9.4 Volts. If you fully discharge the battery, switch to the other battery which should be fully charged. Don't forget to recharge that battery overnight.
-
To get more voltage and current out of the solar panels, place the CubeSatSim on the turntable in the sunshine. You will see the battery charging and the battery will last longer.
-
Make sure Simulator is either shut down (see below) or has the DC power pack plugged in and the RBF pin inserted.
-
Open the top of the frame by using the handle (the small raised tab near the antenna). It should snap open. There will be two wires still attached - the antenna and the push button, so carefully open it.
-
You will see the 9 Volt battery either on top or down the side of the frame. Carefully lift out the battery and unclip it.
-
Clip in the new battery and snap the top closed again. Don't forget to recharge that battery by having the DC power pack plugged in for about 2.5 hours with the RBF pin inserted.
-
Turn off the lamp and the turntable.
-
Insert the RBF pin into the Simulator
-
Plug in the charging cable into the Simulator
-
Press and hold the button on the top for three seconds then release. The Simulator will shutdown in about 20 seconds.