v1.3 0. Home
The CubeSatSim is a low cost satellite emulator that runs on solar panels and batteries, transmits UHF radio telemetry, has a 3D printed frame, and can be extended by additional sensors and modules. This project is sponsored by the not-for-profit Radio Amateur Satellite Corporation, AMSAT®.
This page is for the new beta v1.3 hardware.
If you have the v1.0, v1.1, or v1.2 hardware, use these instructions

Here you will find documentation about this project and detailed install instructions.
The CubeSatSim has the following features:
-
Working solar panels and rechargeable batteries
-
Multi-channel voltage, current, and temperature telemetry transmitted in the Amateur Radio UHF band
-
Telemetry decoding using FoxTelem software or APRS software
-
STEM Payload board with Raspberry Pi Pico microcontroller & sensors
-
Tape measure monopole, dipole, or SMA antenna
-
Integrated Low Pass Filter
-
3D printed frame and solar panels
If you don't have the time or money to build a CubeSatSim that transmits real telemetry, you can build a CubeSat Simulator Lite.
Here are the changes between the v1.2 and the v1.3 hardware and software:
Here are the four boards that make up the complete board stack. Left to right: Raspberry Pi Zero WH, Main Board, Battery Board, and STEM Payload Board.

Here is the built board stack:

There is a 3D printed frame, including solar panels:

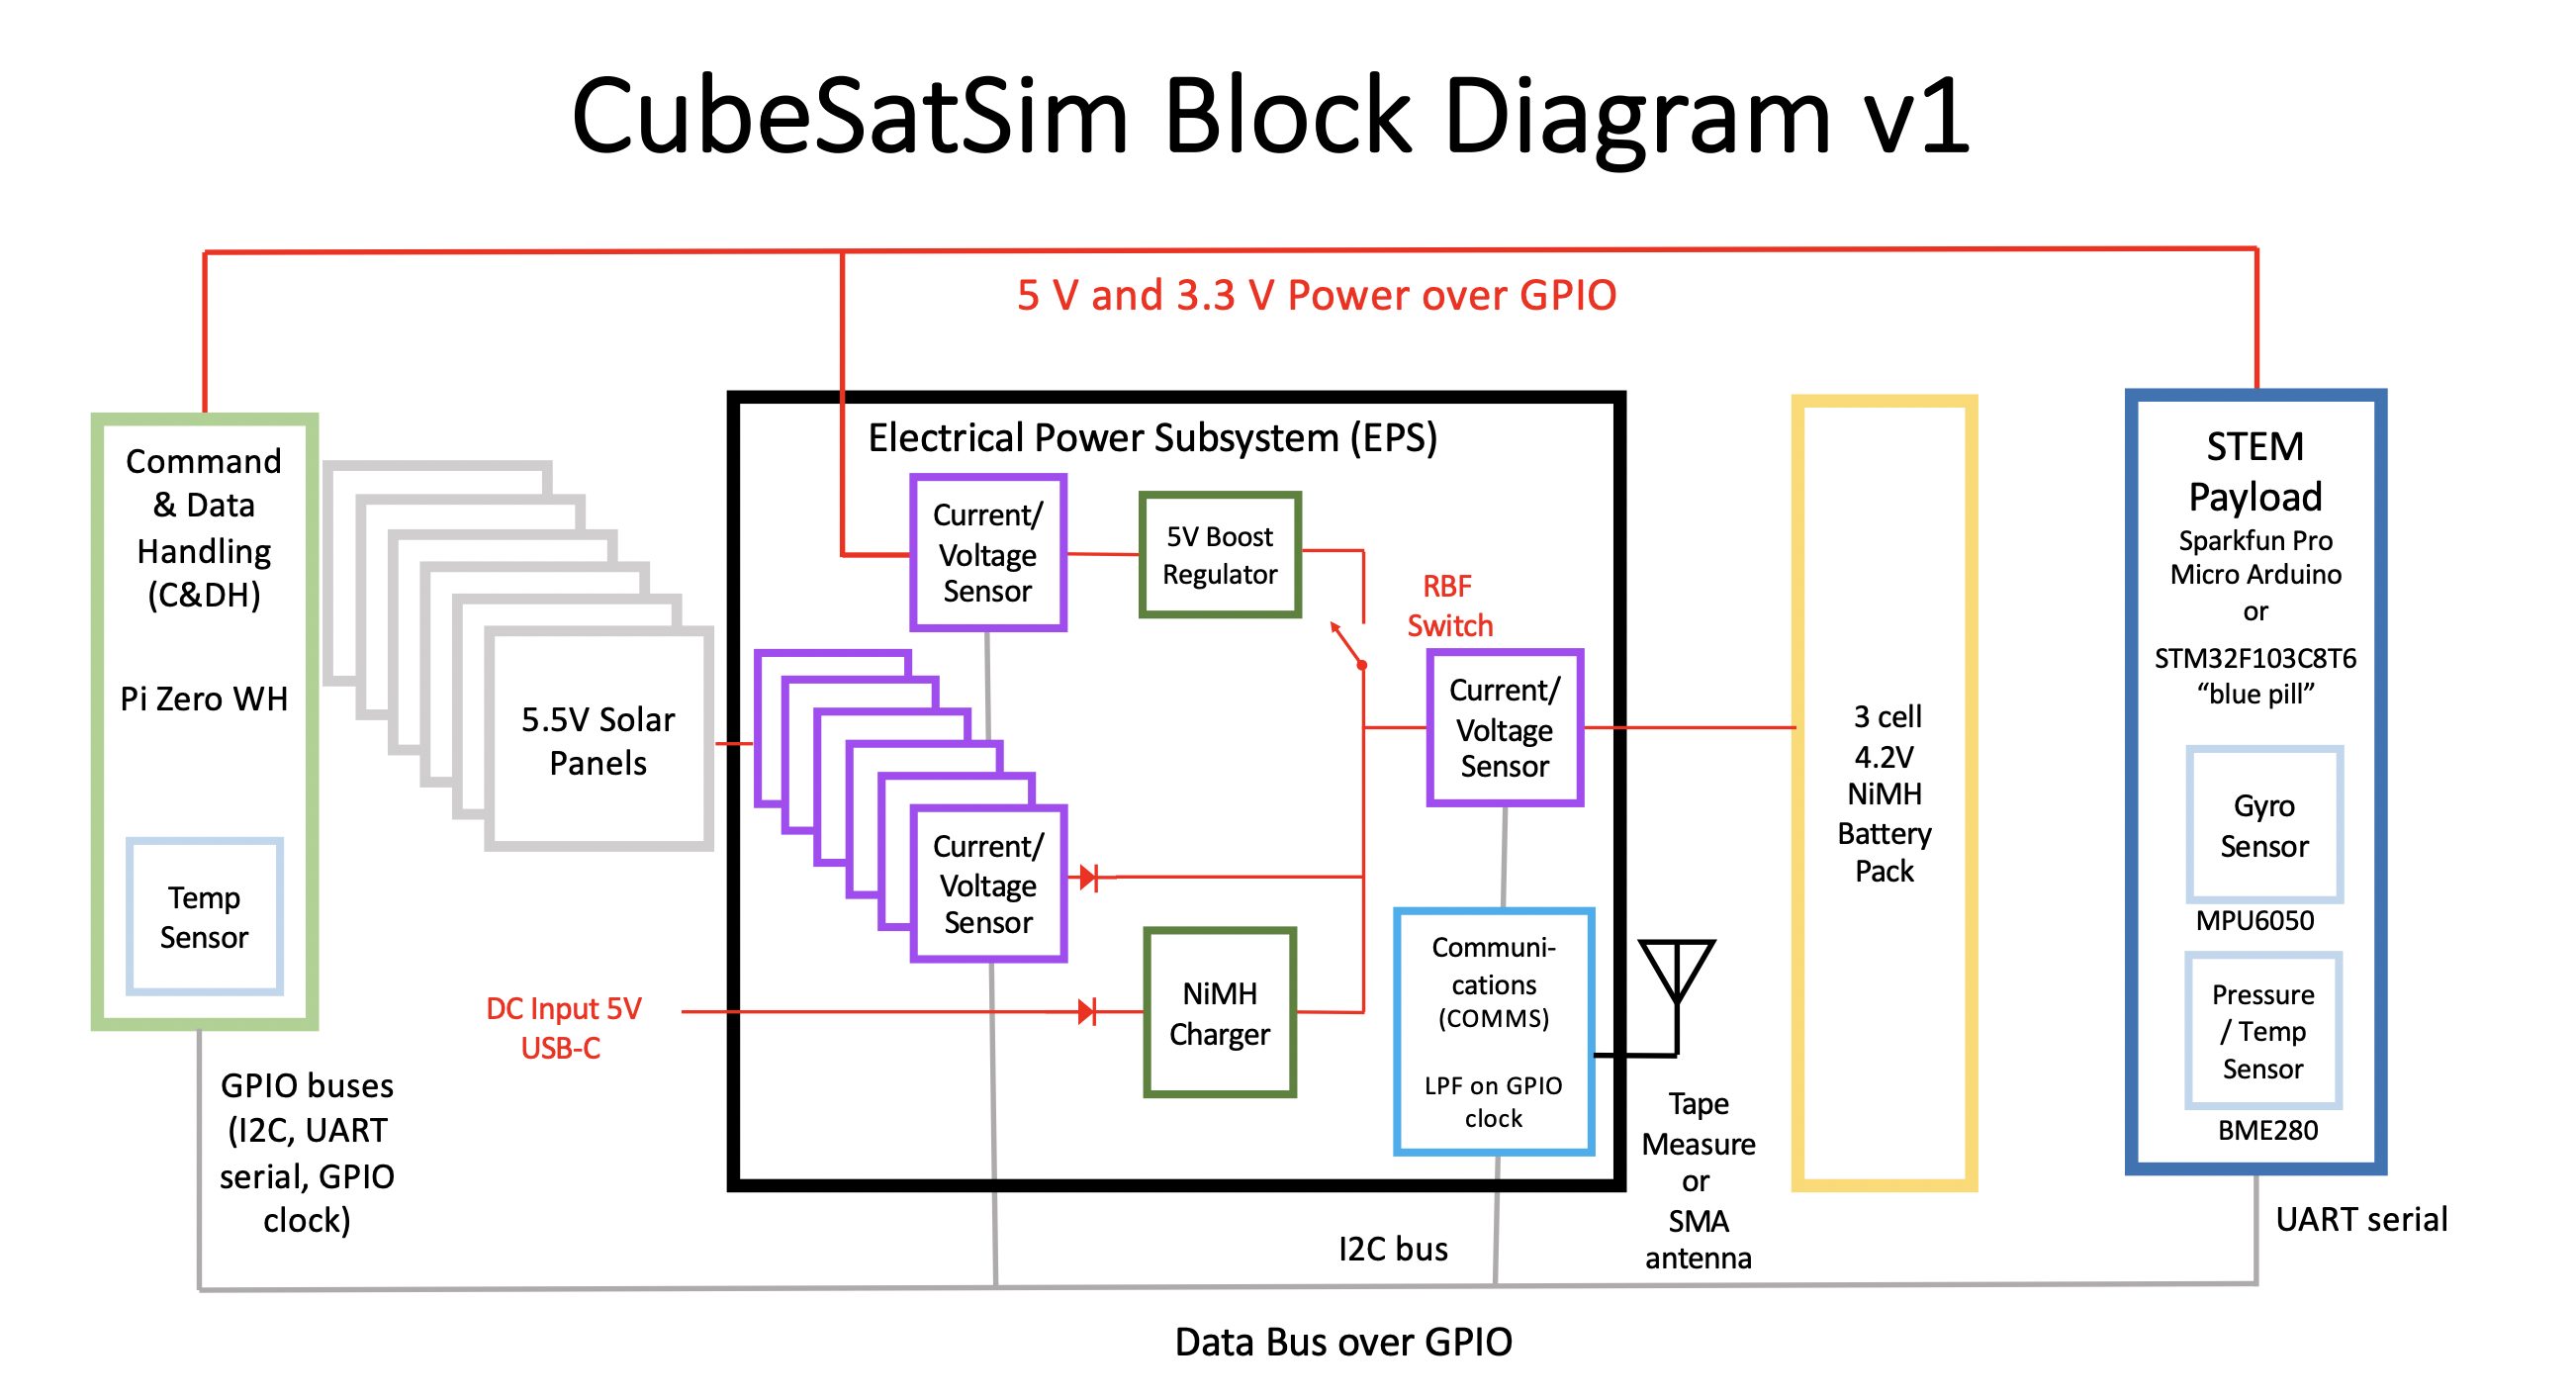
Here is a block diagram of the design:
Parts List to build the CubeSatSim is available here http://cubesatsim.org/bom
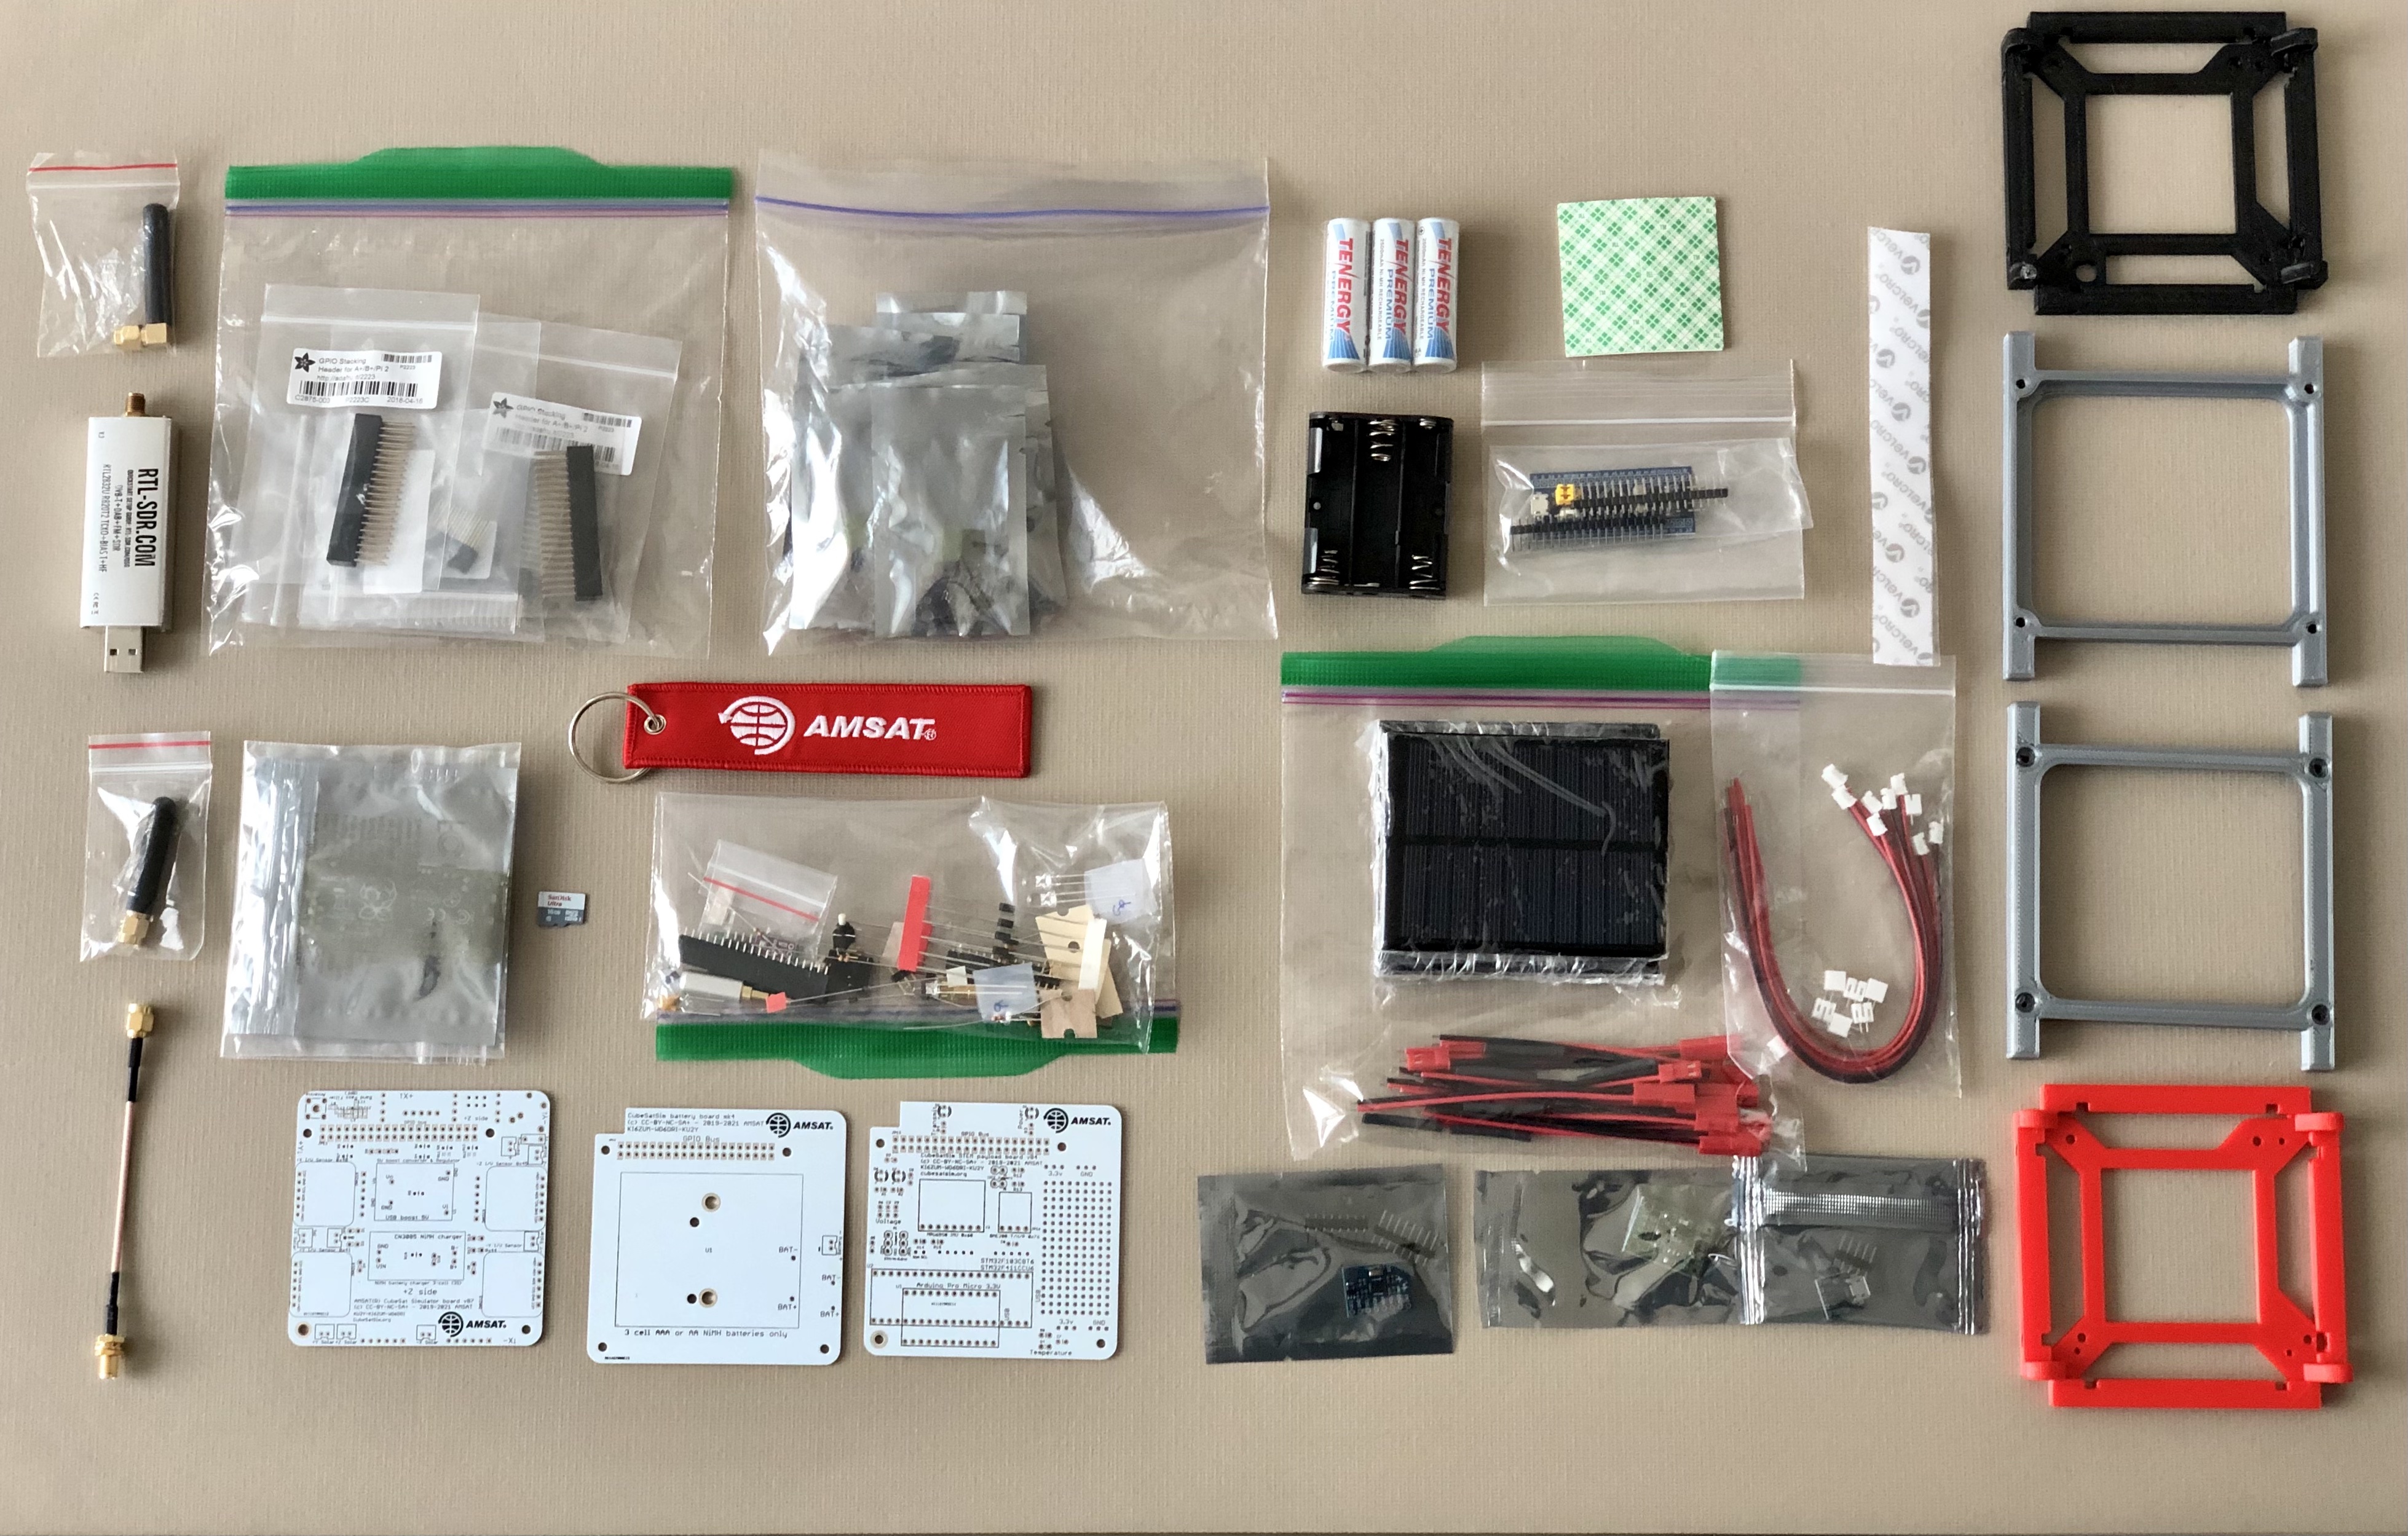
Here is a photo of a kit of parts:
Here are the steps to build a CubeSatSim:
1. Build the Main board Part 1
4. Continue Building the STEM Payload board Part 2
6. Assemble the Solar Panels and Frame
8. Put the Board Stack together and mount in the Frame
The BOM has a sheet "By Steps" which lists the parts needed for each step in order. https://docs.google.com/spreadsheets/d/1EuUqyKnXduMlDo9ghCWJu1VY-y2_TWXYRR3S3zGaw9s/edit?usp=sharing If you have a Google account, you can make a copy of this spreadsheet ("File" then "Make a Copy") and check off each part as you install it.
Here is a set of videos showing the various steps: